1. Start BEDSCAT. To do so: C:\Program Files\Mandarin M3\Bedscat.exe
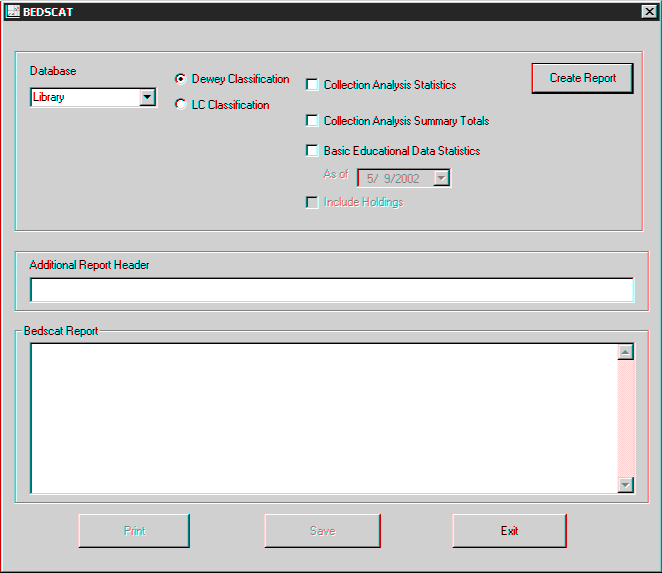
This displays the BEDSCAT window (Figure 1).
FIGURE 1
2. In the Database list, select a database.
3. Select a classification type, Dewey or Library of Congress.
4. Select the items you want to include in the report:
• Collection Analysis Statistics – Lists records by classification (852#h), sorts by year of publication (260#c), and lists the total number of records for that classification.
• Collection Analysis Summary Totals – Lists the total number of records per publication year.
• Basic Educational Data Statistics – Lists the total number of titles, total holdings, total titles added within the year ending on the selected date, total titles marked for deletion, total non-print titles, and the total non-print holdings.
Note: If you select this check box, the Include holdings check box will automatically be selected.
NOTE: Non-print titles have one of the following codes in position 06 of the Leader: g (Projected medium), i (Nonmusical sound recording), j (Musical sound recording), k (Two-dimensional nonprojectable graphic), or r (Three-dimensional artifact or naturally occurring object).
• Include holdings – Includes holding records in the report. If this check box is not selected, the analyses Collection Analysis Statistics and Collection Analysis Summary Totals will only report bibliographic records.
5. In the Additional Report Header box, type any information you want to appear in the report header, such as your school’s name.
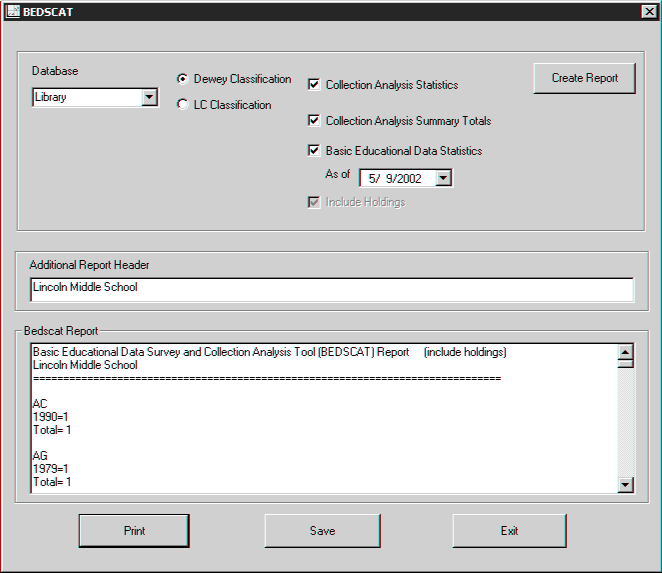
6. Click Create Report. The report processes and then appears in the Bedscat Report box (Figure 2).
FIGURE 2
NOTES:
• If a classification is invalid, an asterisk appears before the classifica- tion in the report (for example, *AC).
• If a record is missing a classification, it appears at the end of the report under the heading *missing classification.
• If a record has no holding, a zero (0) appears after the date.
• If a record has an invalid date, no date, or was published before the year 1900, it appears at the end of the report and is identified as such.
7. You can print or save the report.
• To print the report, click Print. This displays the Print dialog box. Change settings if desired, then click OK.
• To save the report, click Save. This displays the Save As dialog box. Navigate to the location where you want to save the report. In the File name box, type a name for the file, and then click Save. This saves the report in rich text format (rtf).
NOTE: You may lose some formatting when saving the report. If so, adjust the margins while viewing the saved report.