Group Editor
OVERVIEW
M3 Group Editor enables the librarian to create, customize, and modify the group permissions required to gain access to M3 functions. Using an elaborate, hierar- chical security scheme, librarians are able to assign levels of access for Cata- loging, Circulation, OPAC, and database maintenance features.
There are three types of groups: Patron, Item, and Special Reserve. When dis- playing a group listing, a group type icon appears to the left of each group:
• a head signifies a patron group
• a book signifies an item group
• eyeglasses signify a special reserve group
STARTING GROUP EDITOR
-
Open the Mandarin M3 folder on your desktop, then double-click the Group Editor icon. This displays the Login dialog box.
-
In the Login Name box, type admin.
-
In the Password box, type boca raton, and then click OK. This displays the main Group Editor window (Figure 5.1).
FIGURE 5.1

CREATING A NEW GROUP
For this example, we will create a new special reserve group.
-
In the main Group Editor window, click New. This displays the New Group dialog box (Figure 5.2).
FIGURE 5.2
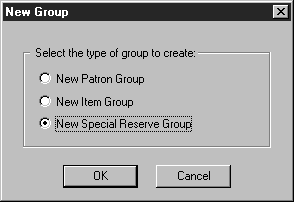
-
Click New Special Reserve Group, and then click OK.
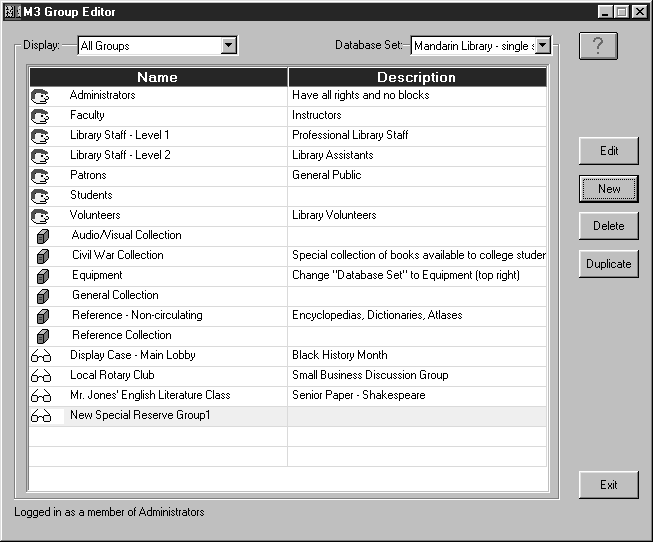
This places a New Special Reserve Group in the Group Editor window (Figure 5.3).
FIGURE 5.3
-
Select the New Special Reserve Group, then click Edit.
This displays the Special Reserve Group window. Here, you can customize this group’s patron privileges and item parameters.
-
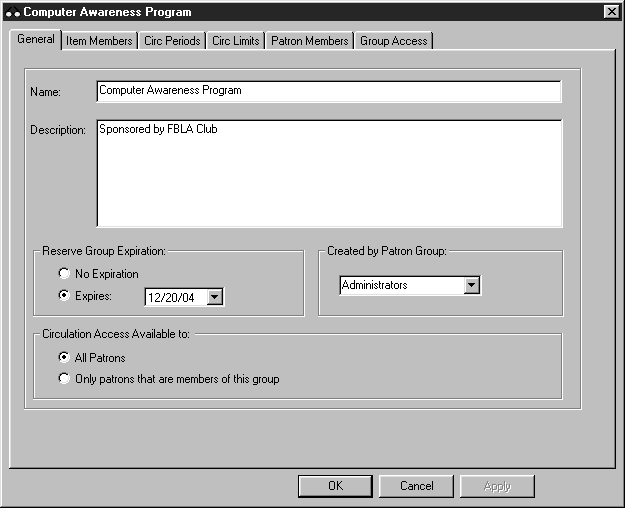
Click the General tab.
-
In the Name box, type Computer Awareness Program.
-
In the Description box, type Sponsored by FBLA Club.
-
Under Reserve Group Expiration, click Expires, and then select a date.
-
Under Created by Patron Group, leave the entry as Administrators.
-
Under Circulation Access Available to, click All Patrons.
FIGURE 5.4
-
Click the Item Members tab.
-
A message appears indicating that there are no records found. Click OK.
-
In the Display list (under the tab names), select Search.
This displays the Search dialog box. You can now add item members to the group just created by searching for items.
-
In the first keyword box, type computer*, and then click Search.
-
Select the check box next to each item you want to add to the group, and then click Add.
-
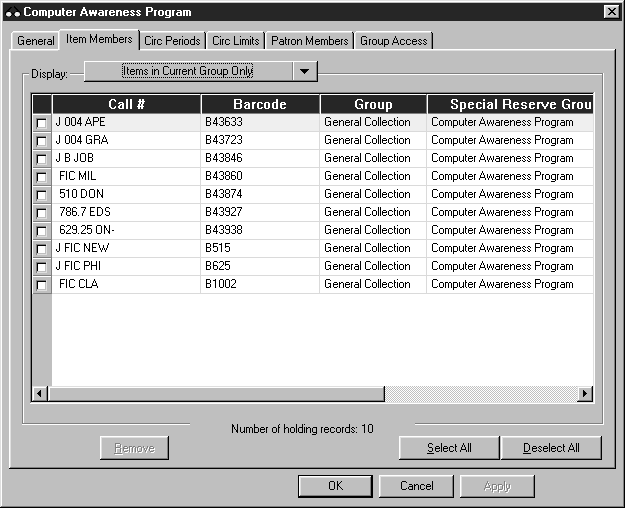
In the Display list, select Items in Current Group Only.
The list refreshes to display only the items you selected and added to the group (Figure 5.5).
FIGURE 5.5
-
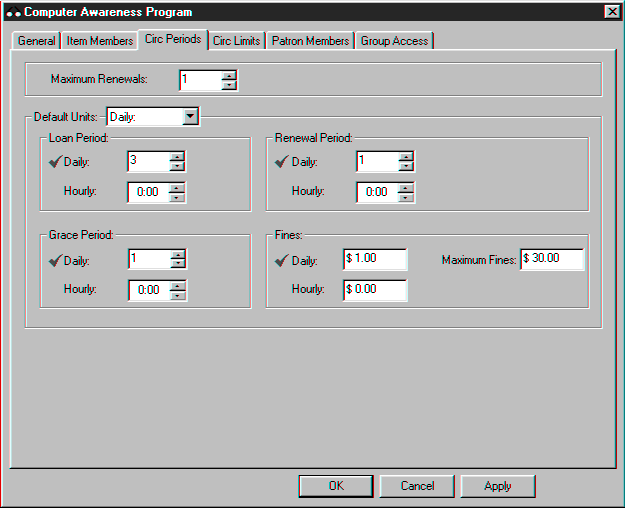
Click the Circ Periods tab (Figure 5.6) and establish circulation time frames and fine amounts in the boxes provided. When finished, click Apply.
FIGURE 5.6
-
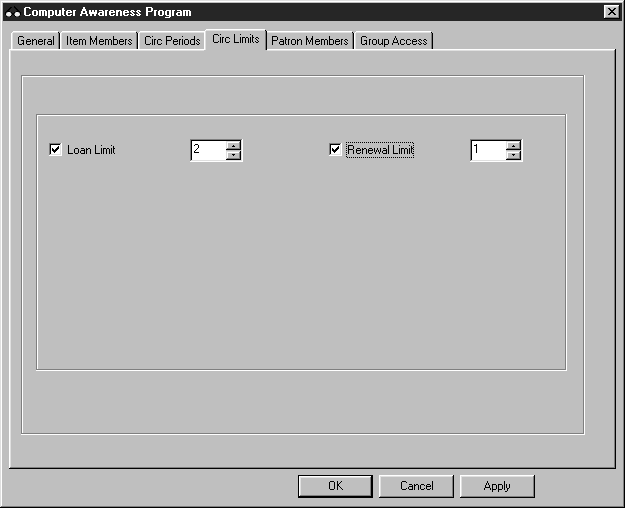
Click the Circ Limits tab (Figure 5.7) and establish the circulation quantity limits. Select a limit type check box, then establish the limit in the corresponding box.
FIGURE 5.7
-
When finished, click Apply, and then click OK. This displays the main Group Editor window with the new group listed.
-
To review the Computer Awareness Program group and its attribute, select the group, and then click Edit.
VIEWING GROUP INFORMATION
Patron Groups
To review the privileges and parameters of a patron group:
-
In the main Group Editor window, select a patron group. (If you don’t have any patron groups, create one now before proceeding.)
-
Click Edit. This displays the Patron Group window.
-
Click each tab and review the contents.
-
When finished, click Cancel to return to the main Group Editor window.
Tip: Use the Item Group Overrides tab to grant a patron group rights to over- ride specific circulation limits connected to item groups. For example, if the item group “General Collection” has a loan period of 14 days, the “Volunteers” patron group could be given a loan period of 21 days.
NOTE: When the check box corresponding to a feature or limit is selected, the feature or limit is enabled. In this example, the patron group is comprised of Library Assistants. Therefore, you will notice that the members of this group have more privileges than general patrons/students and fewer privileges than the professional library staff.
Tip: The Members tab lists items assigned to the item group. New items may be added or removed when necessary. Items assigned to this group adhere to the circulation parameters established in the Circ Periods tab.
Item Groups
To review the parameters of an item group:
-
In the main Group Editor window, select an item group. (If you don’t have any item groups, create one now before proceeding.)
-
Click Edit. This displays the Item Group window.
-
Click each tab and review the contents.
-
When finished, click Cancel to return to the main Group Editor window.
NOTE: When the check box corresponding to a feature or limit is selected, the feature or limit is enabled.
Special Reserve Groups
To review the privileges and parameters of a special reserve group:
-
In the main Group Editor window, select a special reserve group. (If you don’t have any special reserve groups, create one now before pro- ceeding.).
-
Click Edit. This displays the Special Reserve Group window.
-
Click each tab and review the contents.
-
When finished, click Cancel to return to the main Group Editor window.
NOTE: When the check box corresponding to a feature or limit is selected, the feature or limit is enabled. In this example, notice that the tabs Circ Periods, Circ Limits, and Patron Members do not display any information. The items in this special reserve group are being placed into a display case in the lobby of the library; therefore, the items will not circulate.