OVERVIEW
Note: This tutorial may not explain all features available in the OPAC.
With the Windows-based OPAC module, you can:
• Conduct Standard, Enhanced, and Visual Catalog searches of your library’s holdings
• Select different interface languages
• Determine item availability and location
• Work with search results in brief and expanded record formats
• View book cover images
• View and link to “See” and “See also” cross-references with the optional Authority Control module
• Print records or save records to file
• Add records to the Bookbag; print or save records in the Bookbag
• Use Shelf Browse to locate records
• Review your search session history and return to prior searches
• Allow patrons to view their transaction history and personal information with the My Account tab
• Enter or scan barcodes into the Bookbag to create a list of items
• Use the Bulletin Board to deliver information to patrons
• Customize the appearance of the OPAC with your library name
• Customize the Visual Catalog interface
STARTING THE OPAC
Open the Mandarin M3 folder on your desktop, then double-click the OPAC icon. This displays the main OPAC window (Figure 2.1) with Standard Search selected.
FIGURE 2.1
The header can be customized to display the name of your library or institution.
Language Options
Patrons can change the interface language of the OPAC at any time; this does not change the language of the information in the MARC records. Patrons may choose from English (default), French, Spanish, German, and Italian.
Click Languages. This displays the Languages dialog box with the list of language choices.
Bulletin Board Feature
The Bulletin Board feature links to a local HTML file or a Web page. Use this fea- ture to link to customized information, the library home page, or a page of public service announcements.
Click Bulletin Board. This displays a blank bulletin board.
To configure your bulletin board, click the Start button, select Programs, select Mandarin M3, select Utilities, and then click Setup Bulletin Board. Follow the prompts.
STANDARD SEARCH
Tip: To ensure a successful search, M3 automatically searches as follows:
• The Subject field searches all Subject and Summary fields of the MARC Record.
• The Title field searches Title, Added Title, Contents, and Notes fields of the MARC Record.
• The Author field searches Author, Added Author, and Responsibility Statement of the MARC Record.
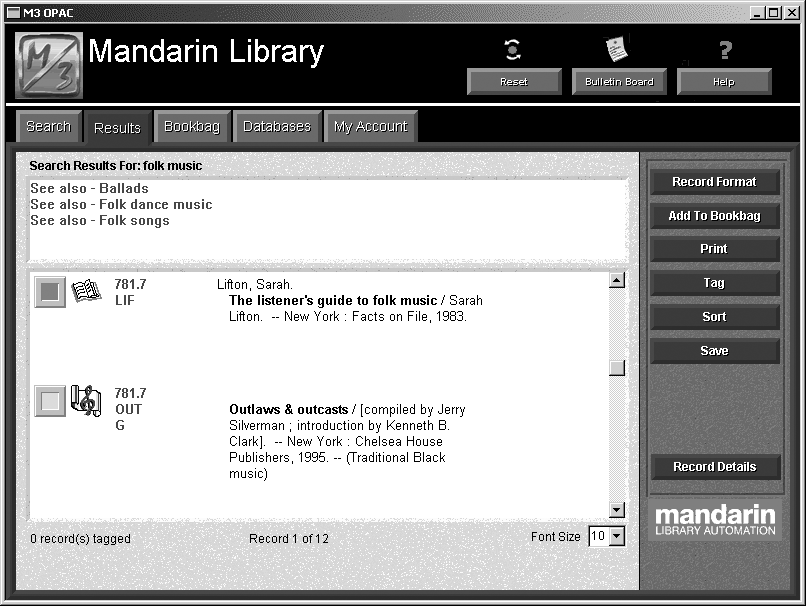
FIGURE 2.2
Standard Search allows patrons to easily search your catalog with the familiar Subject, Title, or Author fields. A patron can enter a search term in the keyword box or click Browse to view a list of all data currently contained in the corresponding record index. M3 can be configured to search more or fewer fields of the MARC record or to default to different record indexes at the librarian’s discretion.
Search Example 1
In the Subject keyword box, type a keyword, then click Search. This displays the Search Results list (Figure 2.2).
• A media type icon displays next to the call number of each record. Media type icons in this results list include book, music, video, and Web site. Scroll through the search results list to view titles.
• When the mouse points to the media type icon, the icon type displays. (It may take a moment for the text to display.)
• A green box to the left of the record indicates that the item is avail- able; a red box indicates that the item is not available. Clicking this box tags the record for functions such as printing or adding to the Bookbag.
Tips:
• Click Sort to sort by Author, Call Number, Call Number by Prefix, Copy- right Date, or Title.
• Active Web links can be enabled in the OPAC by entering a Web address and optional description in the bibliographic record.
If you add the optional Authority Control module to your M3 system, “See” and “See also” cross-references will display in the Cross-Reference box (shown in Figure 2.2). You will be able to view records associated with a cross-reference by clicking the “See also” term.
Tip: Use the truncation asterisk (*), wildcard ques- tion mark (?), and phrase quotation marks (“ ”) with your keywords.
Examples:
• Farm* finds farms, farmer, farmers, farming, and so on.
• Wom?n finds woman and women.
• “African American” only looks for the keywords when they appear next to each other. This eliminates false results in which the words are listed separately.
Search Example 2
-
Click the Search tab, and then click Clear.
-
In the Title keyword box, type a title, and then click Search. This displays the Search Results list.
-
Select a record, then click Record Details. This displays detailed information about the selected title.
Search Example 3
-
Click the Search tab, and then click Clear.
-
In the Subject keyword box, type a keyword, and then click Search.
-
-
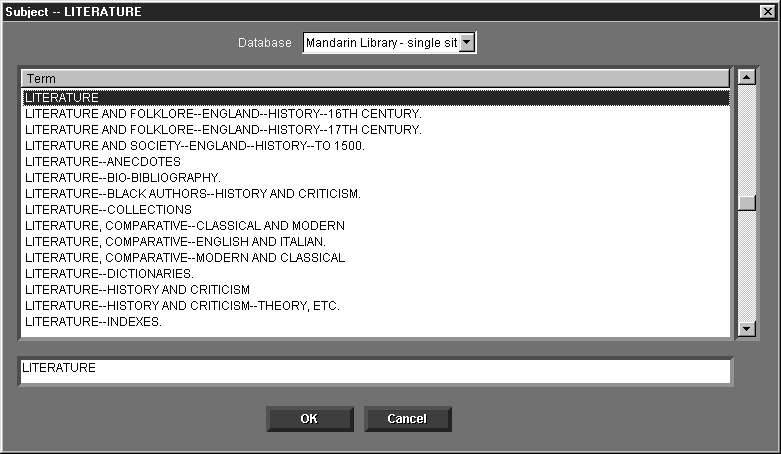
Click the Browse button next to the Subject keyword box to display a list of subject headings (Figure 2.3). This list allows you to narrow your search to a specific area of interest.
FIGURE 2.3
-
Select a subject heading in the list, and then click OK. The selected term appears in the Subject keyword box.
-
Click Search to view the Search Results list for this subject.
Search Example 5
-
Click the Search tab, and then click Clear.
-
A patron can search the Author field by entering a name in any order: for example, Steinbeck, John or John Steinbeck or just Steinbeck.
-
In the Author keyword box, type any form of an author’s name and then click Search. This displays the Search Results list. By default, the records display in bibliographic record format.
Tip: Record Format allows patrons to choose the display format that best suits their needs. Standard options include Bibliographic, List, Full MARC, Catalog Card, Brief Labeled, Expanded Labeled, and Compressed List.
-
To view other record format display options, click Record Format.
Select a different format to view, and then click OK.
OR
Click Cancel to close the Record Format dialog box.
-
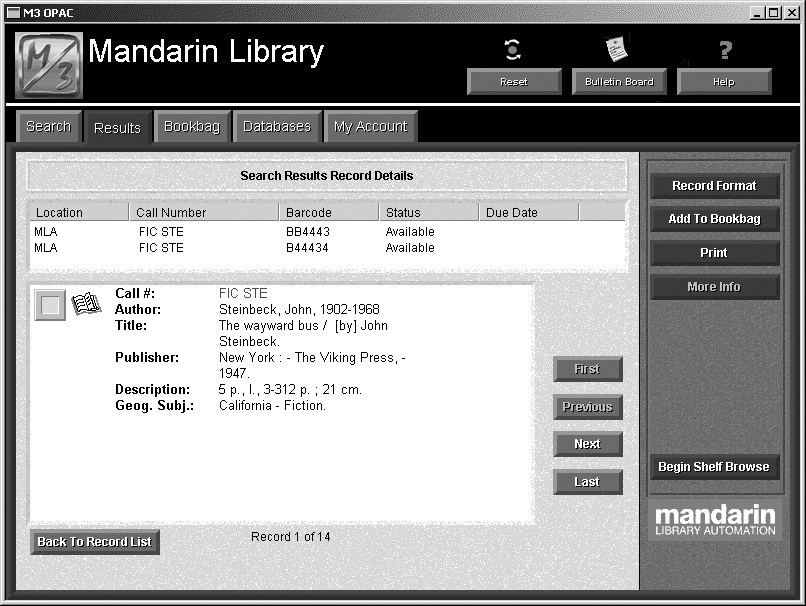
To view record details, select a record and then click Record Details. This
displays detailed information about the selected title and lists all copies owned by the library, as shown in Figure 2.4.
FIGURE 2.4
Tip: Shelf Browse allows you to quickly find records with a call number similar to that of a selected record. This feature creates a virtual electronic shelf and simulates a patron browsing the shelves and discovering books/items that may not be discovered any other way.
-
When finished reviewing the record details, click Back To Record List.
USING THE BOOKBAG
To create a reading list or bibliography, click the green/red check box to tag indi- vidual records in the Search Results list. (Green indicates the item is available; red indicates unavailable.)
-
Tag at least three records.
-
Click Add to Bookbag, and then click Add Tagged.
-
Click the Bookbag tab to view the records you added.
From here, you can print or save the list. You can also add records to the list by scanning or entering barcodes, but this feature is not enabled by default; refer to the M3 Users Guide for instructions on enabling this feature.
ENHANCED SEARCH
Tip: If a patron is not sure what index to search, the Enhanced Search index list includes the Anywhere option. This option searches for the entered term anywhere in the MARC record.
Enhanced Search allows the user to type a search query into one or more of three keyword boxes. To select different record indexes or Boolean operators, click the corresponding arrow button, and then select from the list. (You can also use the Browse button to enter a search term, as explained in “Search Example 3” on page 2-4.)
Search Example
-
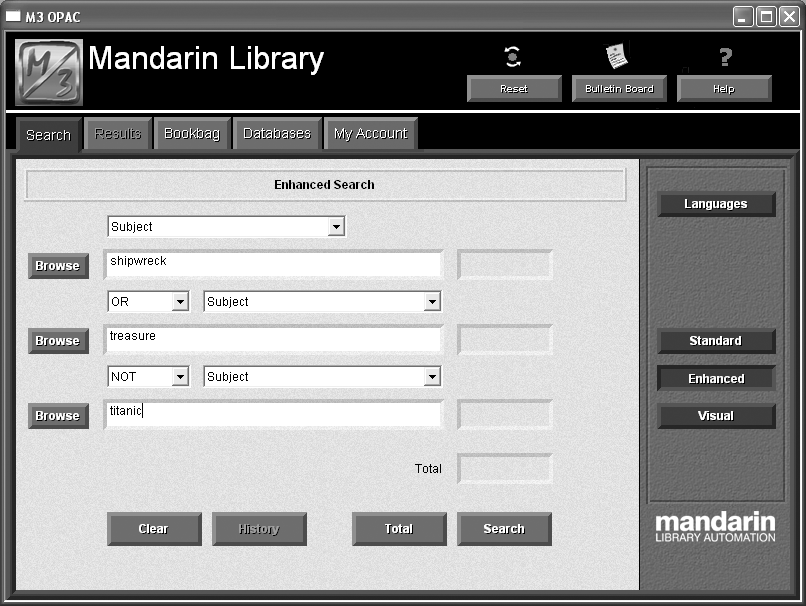
Click the Search tab, and then click Enhanced. This displays the Enhanced Search window (Figure 2.5).
-
In the first keyword box (under Subject), type shipwreck.
-
In the Boolean operator list below, select OR.
-
In the second index list, select Subject, then type treasure in the second keyword box.
-
In the second Boolean operator list, select NOT.
-
In the third index list, select Subject, then type titanic in the third keyword box (shown in Figure 2.5).
FIGURE 2.5
Tip: The index lists can be customized to display different indexes.
Tip: Click History to view a list of your Enhanced Search queries during this session.
-
Click Search. If matches are found, the Search Results list displays. Your options are the same as those described in “Standard Search” beginning on page 2-3.
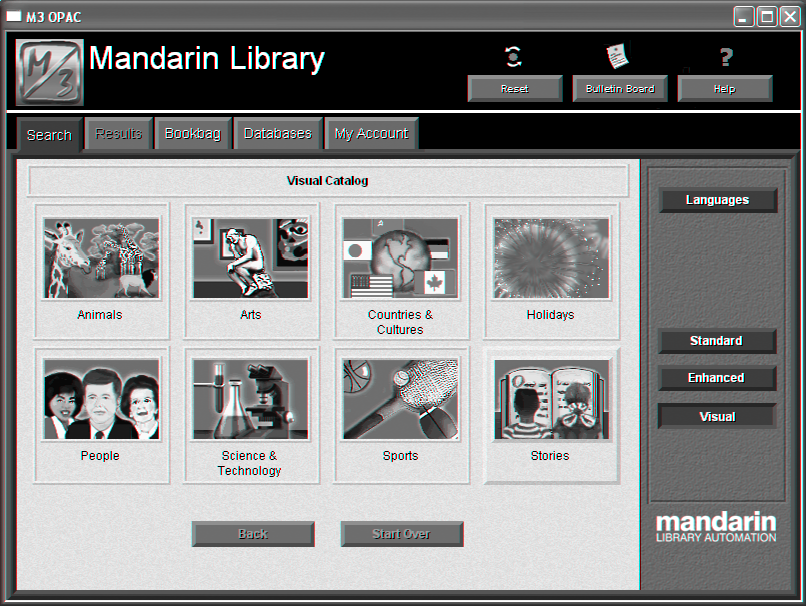
VISUAL CATALOG SEARCH
Visual Catalog Search combines library-definable queries that are organized into a hierarchy of topics and subtopics utilizing graphics and text. This easily configurable graphical interface offers the following benefits:
• Helps younger patrons quickly find library materials via visual cues, such as Animals or Countries & Cultures
• Creates databases for special groups, faculty, and students, such as “Home Schoolers” or “Rotary Club”
• Queries special collections, such as “New Books,” “e-Books,” or “Video Collection”
• Launches software applications, such as WordPad
• Launches CD-ROM applications, such as an encyclopedia
• Launches URLs (MARC field 856), such as “Featured Web Sites of the Week”
To perform a Visual Search:
-
Click the Search tab, and then click Visual.
-
Click each of the eight buttons featured in the Visual Catalog interface and tour on your own.
FIGURE 2.6
Tips:
• M3 includes over 75 colorful graphics for use in the Visual Catalog. Additional graphics can be used from sources on the Internet or your own files.
• Topic, query, and launcher buttons look alike. What they do when selected differenti- ates them. A topic button opens a sub-menu. A query button returns search results. A launcher button opens an application or a Web page.
• Two navigation buttons function as follows: Back returns to the previous menu level; Start Over returns to the first menu level.
DATABASES TAB
M3 can be configured to host the collections of a single library or the collections of many libraries either as a Classic Merged Union Catalog or Virtual Union Catalog. The system can be configured to search the local collection first and, if the desired record is not found, to then search other collections.
A patron can choose which collections to search by clicking the Databases tab. Click the Databases tab to review layout.
MY ACCOUNT TAB
This feature allows patrons to view their own open and closed transactions as well as their personal information on file with the library. This tab is not enabled by default; refer to the M3 Users Guide for instructions on enabling this feature.
-
Click the My Account tab. This displays the My Login dialog box.
-
In the Patron Barcode box, type a patron barcode that exists in the system. (If you are using Mandarin’s sample record database, type P2.)
-
In the Password box, type the patron’s password, then click OK. (If you are using Mandarin’s sample record database, type demo.) This displays Open Transactions with any current, or open, transactions that the library has on file for the patron. The Current button is now active.
-
Click Historical to view closed or historical transactions.
You can also view patron contact information and a patron photo (if there is one on file), but this feature is not enabled by default; refer to the M3 Users Guide for instructions on enabling this feature. After enabling, a My Info button will appear in this window.