Creating a New Special Reserve Group
1. Select a Catalog database in the
Database Set list.
2. In the
New list, select
Special Reserve Group, then click the button on the right. This creates a “New Special Reserve Group1” entry.

3. Click the

link to the right of the new group. This opens the General page for the new group. Proceed with the following sections to enter information for this group.
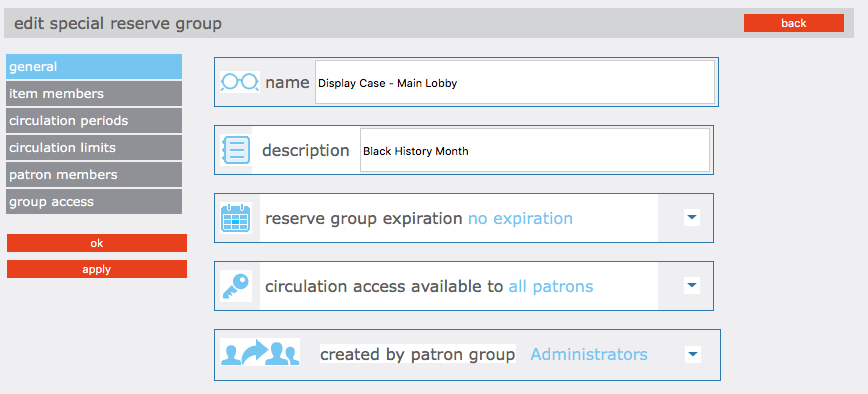
General. On this page, enter identification information for the group as well as information that impacts circulation behavior.
1. In the Name box, type the special reserve group’s name.
2. In the Description box, type any information needed to describe this group. This will display on the main Group Editor page.
3. Under Reserve Group Expiration:
-
If the group has no planned expiration date, click
No Expiration. -
If an expiration date is known, click
Expires, and then type or select a date in the adjacent box. To select a date, click the
Calendar arrow to display a calendar. Click the calendar’s left (<) and right (>) arrows to select a month, then click the desired date. The date appears in the
Expires box.
Note: On the Expires date the settings for
the items and/or patrons of this Special
Reserve Group revert to the settings of
the standard group (991#a) for each item
and/or patron. The Special Reserve Group
settings can be made active again by
changing the Expires date to the future.
4. The Created by Patron Group box displays the patron group of the user that created this group. Only administrators can modify this entry.
5. Under Circulation Access Available to:
-
Click
All Patrons if you want all patrons to have access to items included in this special reserve group.
-
Click
Only patrons that are members of this group if you want to restrict access to items in this special reserve group.
6. Click Apply to save your entries on this page, then click Item Members in the side menu and proceed to the next section.
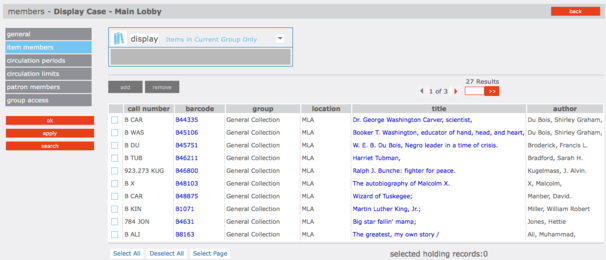
Item Members. On this page, add and remove item group members. Items assigned to this group adhere to the circulation parameters you establish in the next section, Circ Periods.
1. In the Display list, select All Items. This displays a list of all items, not just items currently assigned to this group.
Tip: You can also scan items into the group. To do so,
select Scan Items into Current Group in the
Display list. Then scan the item’s barcode or type the
barcode in the Barcode box.
Scanning items is usually the easiest method to get items
into a Special Group.
2. Select the check box next to each item you want to add to the special reserve group. To locate specific items:
-
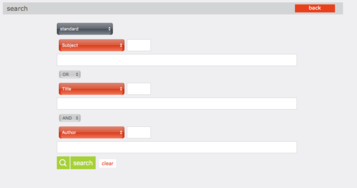
On the side menu, click Search. This displays the Search page.
-
Type your search query into the appropriate boxes. To select a different MARC field or Boolean operator, click the arrow next to the appropriate list, and then select the preferred field or operator. Then click Search. This displays a list of items matching your search query.
3. When all desired items are selected, click Add. This displays the new group with its assigned items.
4. Click Apply to save your entries on this page, then click Circ Periods in the side menu and proceed to the next section.
Tip: Click Select All at the bottom of the list to select all items listed.
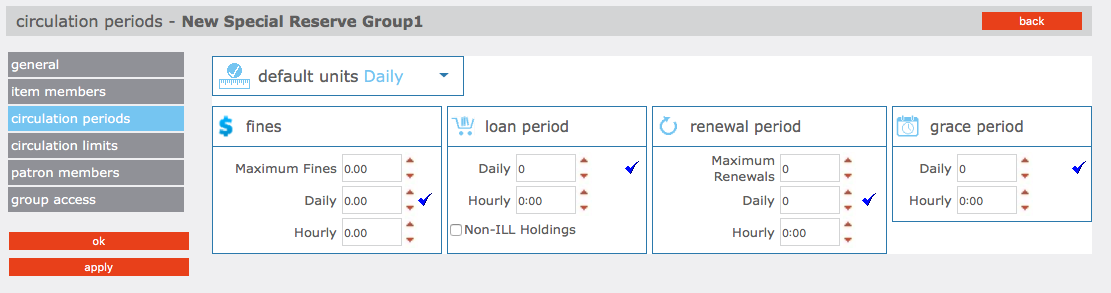
Circ Periods. On this page, establish circulation time frames and fine amounts for this special reserve group.
1. Enter
circulation time frames and fine amounts for this special reserve group. See steps 3 and 4. in
Item Group Overrides at Creating a New Patron Group.2. Click Apply to save your entries on this page, then click Circ Limits in the side menu and proceed to the next section.
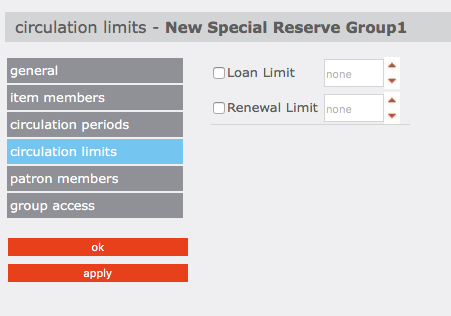
Circ Limits. On this page, customize the circulation quantity limits for the special reserve group. Specify the maximum number of items for each type of transaction listed.
1. Select a circulation limit for each limit type. To do so:
-
Select the check box next to the desired limit type. If a limit is not selected, no limit is assigned.
-
In the list next to the limit type, select a limit amount.
2. Click Apply to save your entries on this page, then click Patron Members in the side menu and proceed to the next section.
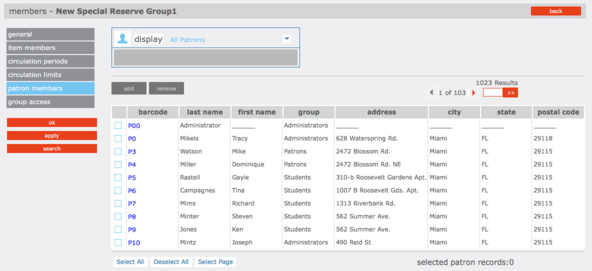
Patron Members. On this page, add and remove patron members.
1. In the Display list, select All Patrons. This displays a list of all patrons, not just patrons currently assigned to this group.
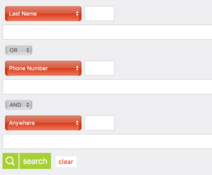
2. Select each patron you want to add to the special reserve group. To locate specific patrons:
-
On the side menu, click
Search. This displays the Search page.
-
Type your search query into the appropriate boxes. To select a different MARC field or Boolean operator, click the
arrow next to the appropriate list, and then select the preferred field or operator. Then click
Search. This displays a list of patrons matching your search query.
3. When all desired patrons are selected, click Add. This displays the new group with its assigned patrons.
4. Click Apply to save your entries on this page, then click Group Access in the side menu and proceed to the next section.
Tip: You can also scan patrons into the group. To do so, select Scan Patrons
into Current Group in the Display list. Then scan the patron’s barcode or type
the barcode in the Barcode box.
Tip: Click Select All at the bottom of the list to select all patrons listed.
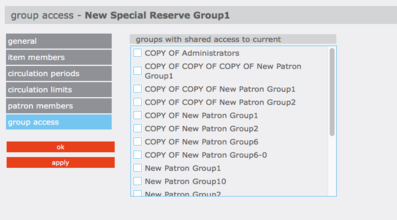
Group Access. On this page, specify which patron groups you want to have access to this group.
1. To make change the group access, select the check box. Repeat this for all groups that you want to have access to this special reserve group.
2. Click OK to save your entries on this page and return to the Group Editor home page.