Before using Circulation, you should set up your library’s system schedule. You can set up multiple schedules to accommodate different times of the year. For example, your summer schedule may differ from the rest of the year.
To set up your library circulation schedule:
On the side menu, click Options. On the Circulation Options page click the button for Schedule. This displays the Circulation Schedule page with four tabs. Enter the appropriate information in each tab as described in the following sections.
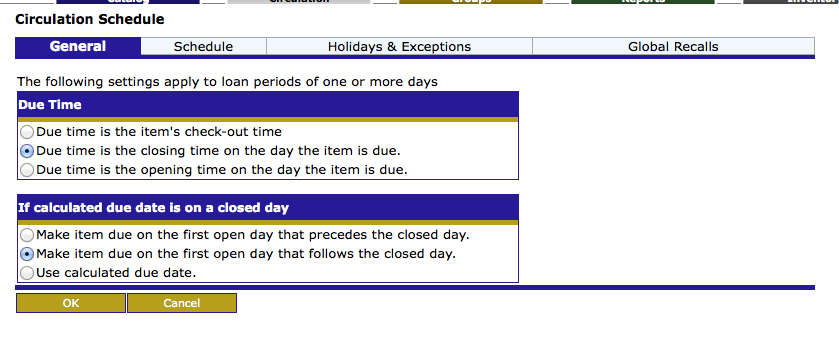
General Tab
In this tab, establish general loan period rules.
1. Under Due Time, click the option appropriate for your library.
2. Under If calculated due date is on a closed day, click the option appropriate for your library.
3. When finished, click the Schedule tab.
Schedule Tab
In this tab, establish periods and indicate your library’s open and closed days. You can create multiple schedules to apply to different times of the year.
1. Under Period, specify this schedule’s starting date and end date. To do so, click Add. This enters a new line. Modify the From and To dates by clicking the date arrows and selecting the desired dates in the calendar.
2. Under Day, click the Mon arrow, and then click Open or Closed. Repeat for all days of the week.
3. Under Circulation Hours, select the Start Time and End Time for each day of the week that you are open. To do so, click a time arrow and select the time.
NOTE: If you want to create an additional schedule period,
wait until you have completed the Holidays & Exceptions
tab and the Global Recalls tab for this schedule period.
4. When finished, click the Holidays & Exceptions tab. or click OK to return to the Circulation Options page and then Close to return to the main Circulation page.
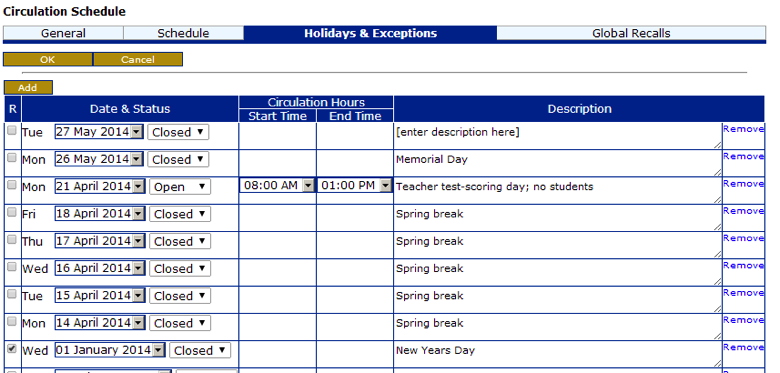
Holidays & Exceptions Tab
In this tab, eliminate or add irregular dates within the schedule you created in the Schedule tab.
1. Click Add. This enters a new line.
2. Enter information for the exception date as follows:
-
Select the R check box if this exception date should repeat every year. This would be appropriate for holidays that always occur on the same date each year, such as New Year’s Day.
-
In the date box under Date & Status, enter the exception date by clicking the date arrow and selecting the desired date in the calendar.
-
In the box beside the date box, select Open or Closed to indicate whether the library is open or closed on the date entered in step B.
-
If you selected Open in step C, enter the Start Time and End Time for this exception day by clicking a time arrow and selecting the time. If you clicked Closed in step C, no times can be entered.
-
In the Description box, type any information necessary to clarify this exception date.
3. To enter more dates, click Add and repeat step 2.
4. When finished, click the Global Recalls tab. or click OK to return to the Circulation Options page and then Close to return to the main Circulation page.
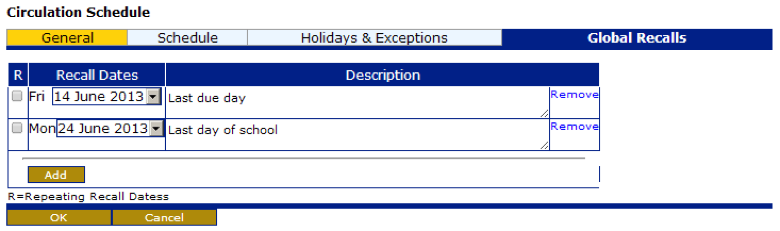
Global Recalls Tab
In this tab, specify the date all items have to be back in the library, such as the end of a school term or an inventory date.
1. Click Add. This enters a new line.
2. Enter information for the closing date as follows:
A. Select the R check box if this closing date should repeat every year.
B. Under Recall Dates, enter the closing date by clicking the date arrow and selecting the desired date in the calendar.
C. In the Description box, type any text necessary to clarify this closing date.
3. To enter more dates, click Add and repeat step 2.
4. When finished, click OK. to return to the Circulation Options page and then Close to return to the main Circulation page.
5. If you want to add another circulation period (such as a “summer hours” schedule), repeat the procedures for the Schedule, Holidays & Exceptions, and Global Recalls tabs.