During a search session, you may want to set aside promising records for addi- tional review or batch printing. The Bookbag temporarily stores records during the search session. The Reset feature deletes any records stored in the Bookbag.
Adding Records to the Bookbag
To add records to the Bookbag from the Search Results window, see “Adding Records to the Bookbag” on page 6-20.
To add records to the Bookbag from the Search Results Record Details window, click Add To Bookbag.
Viewing and Working with Bookbag Records
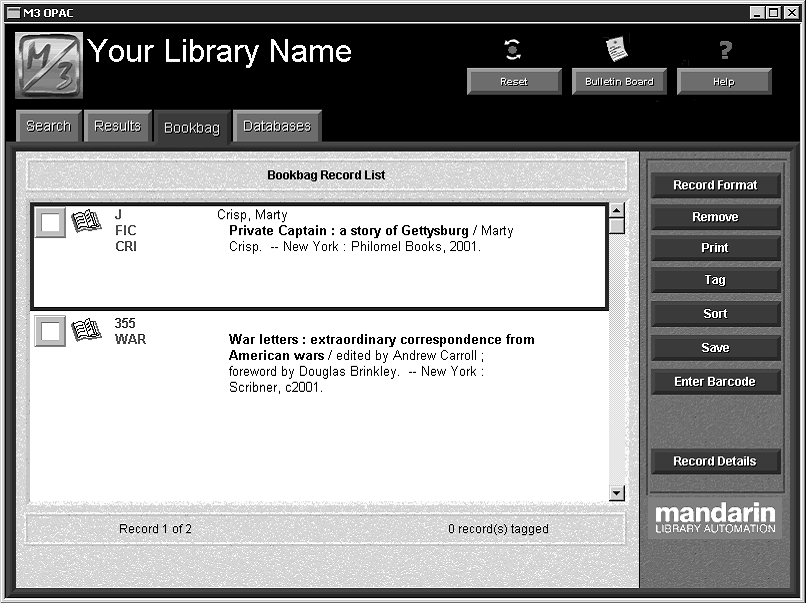
To view the records placed in the Bookbag during the active search session, click the Bookbag tab at any time. A sample Bookbag tab is shown in Figure 6.18.
FIGURE 6.18
The option buttons provide the following options:
• To display records listed in the Bookbag by a different format, click Record Format, and then select a display format. For more information, see “Changing the Record Format” on page 6-20.
• To remove records from the Bookbag, click Remove, and then select an option in the list.
• To print records, follow the procedure in “Printing Records” on page 6-20.
• To tag or untag all records currently in the Bookbag, click Tag, and then select an option in the list.
• To sort the records listed in the Bookbag by a different sort formula, click Sort, and then select a sort formula. For more information.
• To save records to a file, follow the procedure in “Saving Records to a File”
• To enter barcodes to create a list, follow the procedure in the next section, “Using the Bookbag to Create a List.”
• To view the record details for a selected record, click Record Details.
Note: This option must be enabled in the M3Opac.ini file. For instructions, see “BOOKBAG SCREEN setting” on page A-2.
Using the Bookbag to Create a List
You can enter or scan barcodes into the Bookbag to create a list of items. To do so:
1. If the Bookbag tab is not enabled, conduct a search for the first item in your list and add it to the Bookbag.
2. Click the Bookbag tab. This displays the Bookbag Record List window (Figure 6.18).
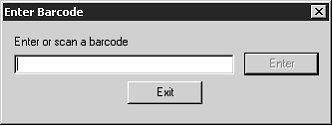
3. Click Enter Barcode. This displays the Enter Barcode dialog box (Figure 6.19).
FIGURE 6.19
4. Type or scan the barcode, then click Enter. Repeat for each item you want to add to the list.
5. When finished, you can print or save the list. To do so, follow the proce- dure in “Printing Records” on page 6-20 or “Saving Records to a File” on page 6-21.
USING THE MY ACCOUNT TAB (OPTIONAL)
The My Account tab is an optional tab that your system administrator can activate if the library chooses to use it. Once activated, patron access must be enabled in the Group Editor. Patrons may then view their current transactions, past transac- tions, and personal information that is on record with the library.
Warning: The following information is only for the use of system administrators. If you do not possess a comprehensive understanding of configuration files, do not attempt to change the M3Opac.ini file. Improper proce- dures could affect the OPAC performance. Before you proceed, it is suggested that you perform a complete backup of your system.
Activating the My Account Tab
To activate the My Account tab:
1. Using a simple text editor such as Notepad or WordPad, open the M3Opac.ini file (the default path is C:\Program Files\Mandarin M3).
2. Under [PATRON HISTORY SCREEN], change Patron_Tab_Visible=0 to Patron_Tab_Visible=1.
3. When finished, save the file. The customized configuration becomes active the next time you start the OPAC.
Allowing Patron Access to the My Account Tab
To allow patrons access to this tab, you must enable the option in the Group Editor module. To so do:
1. Start the Group Editor as explained in “Starting Group Editor” on page 3-3.
2. In the Group Editor main window, select the patron group you want to grant access to the tab, and then click Edit.
3. In the OPAC Access tab:
A. In the Access OPAC list, select Yes.
B. Select the View Transactions check box.
4. Click OK.