Working with Authority Records
Note: You must use a version of M3 that supports Authority Control to work with authority records.
Cataloging Window Features
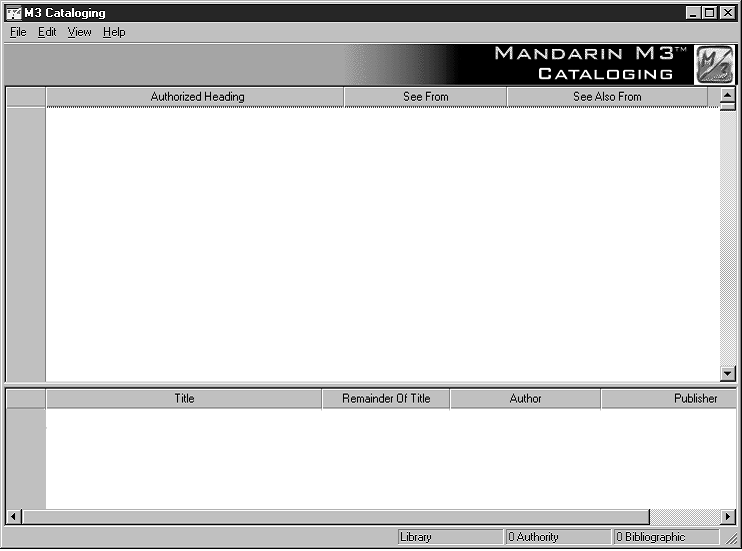
As with the bib and holding versions of the Cataloging window, the authority record version has a split window that displays brief authority and bibliographic records. The default authority version of the window is shown in Figure 4.24. The other window features are similar to the bib version; see “Cataloging Window Fea- tures” on page 4-2 for descriptions.
FIGURE 4.24
Searching for an Authority Record
The Search Dialog Box
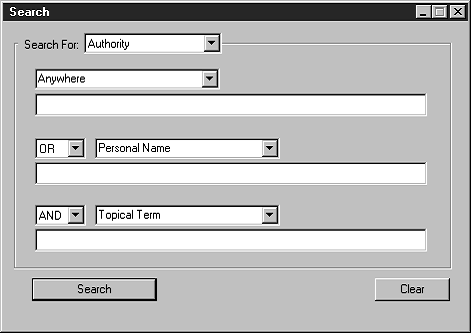
The default authority version of the Search dialog box is shown in Figure 4.25.
FIGURE 4.25
All M3 Search dialog boxes use the keyword search method. You can search for keywords in as many as three authority record fields.
Your system can be configured to display different default authority record fields and Boolean operators.
How to Search
To search for an authority record:
1. On the Edit menu, click Search. This displays the Search dialog box (Figure 4.25).
2. In the Search For list, select Authority.
3. Type your search query into the appropriate keyword boxes. To select a different MARC field or Boolean operator, click the arrow next to the appropriate list, and then select the preferred field or operator. (For search tips, see page 4-4.)
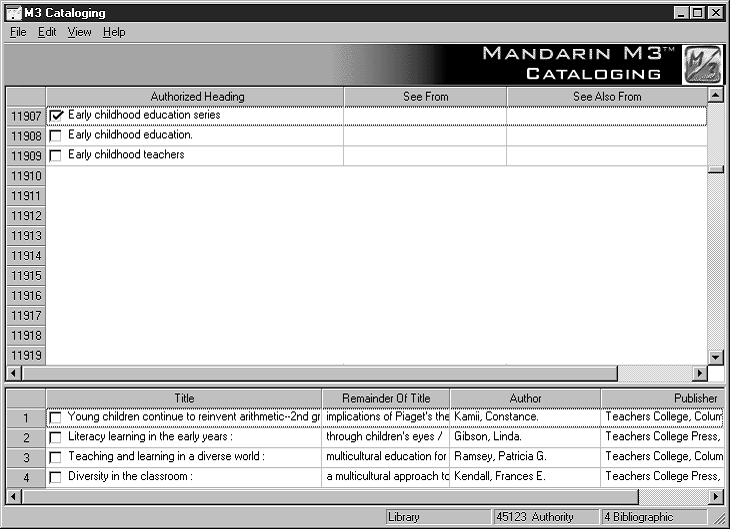
4. Click Search. This displays a list of records matching your search query (Figure 4.26).
FIGURE 4.26
5. From here you can:
• Double-click a brief authority record to view its full MARC record. A full MARC authority record matching this search is shown in Figure 4.29.
• Select a check box to tag the corresponding record for deletion or printing. To tag a block of records, select the first record and press SHIFT while selecting the last record; this tags all records in between.
• Print tagged records or all records in the list. To do so, select Print on the File menu, then click Records (to print tagged) or List (to print all).
• Create a new similar record by clicking Duplicate on the Edit menu. (For instructions, see the following section, “Creating an Authority Record.”)
• Start another search from the Edit menu.
Creating an Authority Record
There are three ways to create a new authority record. (1) You can use a template and edit it to create the new record. (2) You can duplicate an existing authority record, then edit it to create the new record. (3) You can use the Quick Editor method (see “Using the Authority Record Quick Editor” beginning on page 4-27).
From a Template
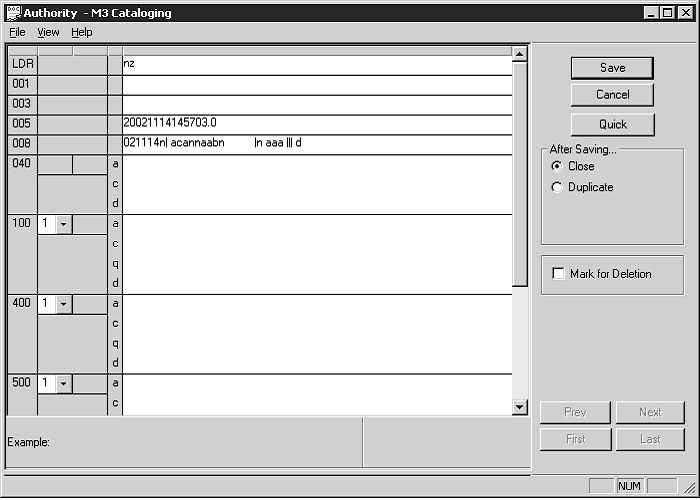
1. On the File menu, select New, and then click Authority Record. (If more than one authority template is available, the Templates dialog box displays (Figure 4.7). Click the desired template, then click OK.) This displays the authority record template in the Authority - Cataloging window
(Figure 4.27).
FIGURE 4.27
Tip: To add an authority record using the Quick Editor method, see “Using the Authority Record Quick Editor” beginning on page 4-27.
Note: To automatically delete all fields left empty when the record is saved, change the Strip Empty Fields entry in the ActiveMarcEdit.ini file (located in your M3 direc- tory) to OVERRIDE=off, then restart the Cataloging module.
2. Enter field and subfield data for the new record. To move through the record, use your keyboard up and down arrows. Notice that status bar information changes to identify the selected field and subfield.
• To access a menu with edit commands (Figure 4.9), right-click the field or subfield you want to edit. From this menu, you can insert, delete, cut, copy, paste, and move fields. You can click Find to locate text within this record, or click Toggle Prompts to change the MARC field labels from numbers to text.
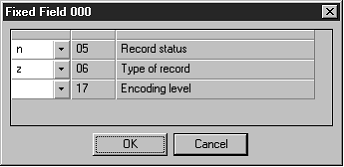
• To access a list of fixed field standard choices (including position and legal characters) pertaining to a particular fixed field, double-click in the field. The dialog box for fixed field 000 is shown in Figure 4.28. You can define your fixed field by typing in your text, or, where avail- able, clicking the arrow button and selecting an option in the list. When finished, click OK.
FIGURE 4.28
• To save a version of this record as a template for future use, click Save As Template on the File menu.
3. When finished editing the record (but before saving), click an option in the After Saving group to indicate what you want to happen after you save the record. The options are:
• Close exits the saved record and returns to the Cataloging window.
• Duplicate creates a new record identical to the one you are saving; you can edit the duplicate record to create another record.
4. To mark this record for deletion, select the Mark for Deletion check box.
For instructions on purging records marked for deletion, see “Step 2: Purging Records Marked for Deletion” on page 4-47.
5. When finished, click Save. This saves the record and displays another record or the Cataloging window, depending on which option you selected in the previous step.
By Duplicating an Existing Authority Record
1. On the Edit menu, click Search. This displays the Search dialog box (Figure 4.19).
2. In the Search For list, select Authority.
3. Type your search query into the appropriate keyword boxes. To select a different MARC field or Boolean operator, click the arrow next to the appropriate list, and then select the preferred field or operator. (For search tips, see page 4-4.)
4. Click Search. This displays a list of records matching your search query (Figure 4.26).
5. Click the authority record to be duplicated. On the Edit menu, click Dupli- cate. This displays the Authority - Cataloging window (Figure 4.27) containing the corresponding full authority record. This is a duplicate authority record.
6. Edit this record as needed. For instructions, see steps 2 through 4 begin- ning on page 4-24.
7. When finished, click Save. This saves the record and displays another record or the Cataloging window, depending on which option you selected in the After Saving group.
Editing an Authority Record
To edit an existing authority record:
1. If the record to be edited is not displayed:
A. On the Edit menu, click Search. This displays the Search dialog box (Figure 4.19).
B. In the Search For list, select Authority.
C. Type your search query into the appropriate boxes. To select a different MARC field or Boolean operator, click the arrow next to the appropriate list, and then select the preferred field or operator. (For search tips, see page 4-4.)
D. Click Search. This displays a list of brief authority records matching your search query.
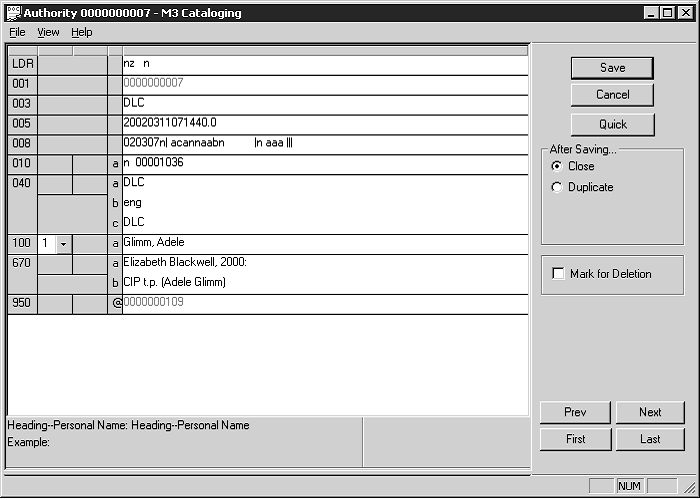
E. Double-click the authority record you want to edit. This displays the corresponding full record (Figure 4.29).
FIGURE 4.29
Tip: To navigate through the records in the search results list, click the navigation buttons Prev, Next, First, and Last.
2. Edit this record as needed. For instructions, see steps 2 through 4 on page 4-24.
3. When finished, click Save. This saves the record and displays another record or the Cataloging window, depending on which option you selected in the After Saving group.
Using the Authority Record Quick Editor
The Quick Editor offers a simplified method for quickly creating and editing authority records. This method provides several commonly-used authority sub- fields, in a predetermined order, for each type of authority record. It also allows you to quickly add, edit, and delete “See From” and “See Also From” references. This method offers only limited access to authority record fields. For full access to additional fields or to change the order of subfields, use the MARC record editor method explained in “Creating an Authority Record” and “Editing an Authority Record” beginning on page 4-24.
Creating an Authority Record Using the Quick Editor
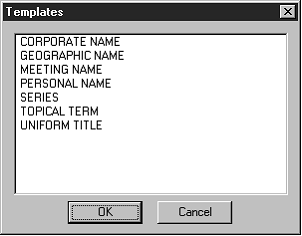
1. On the File menu, select New, and then click Authority Record. This displays the Templates dialog box (Figure 4.30).
FIGURE 4.30
2. Click the desired type of authority record, then click OK. This displays the authority record template in MARC format in the Authority - Cataloging window (Figure 4.31).
FIGURE 4.31
Tip: For information on the After Saving and Mark for Deletion options in this window, see steps 3 and 4 on page 4-25.
3. Click Quick. This displays the Authority - Cataloging Quick Editor window.
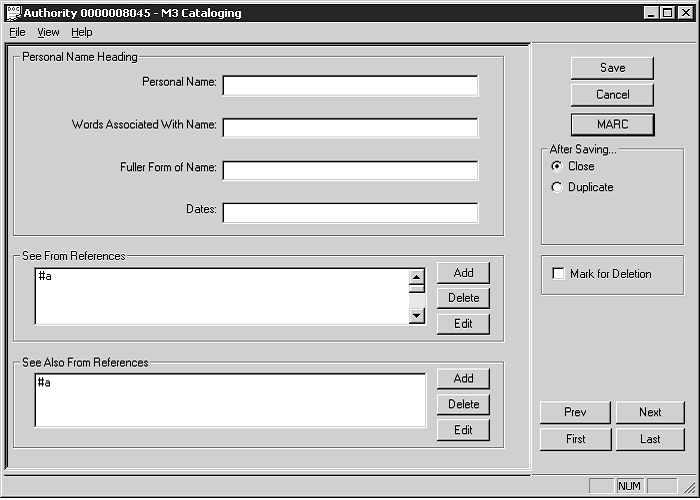
The fields available in the Heading group vary depending on the type of authority record selected in step 2. Shown in Figure 4.32 is the Quick Editor window for a Personal Name authority record.
FIGURE 4.32
See From references (MARC authority field 4xx) lead a searcher from an unauthorized heading to an authorized heading. See Also From references (MARC authority field 5xx) lead a searcher from an authorized heading to another related authorized heading.
NOTE: If you need access to additional fields or otherwise prefer to edit the record in MARC format, click MARC. This returns the record to MARC format (shown in Figure 4.31).
4. In the Heading group, type entries as desired.
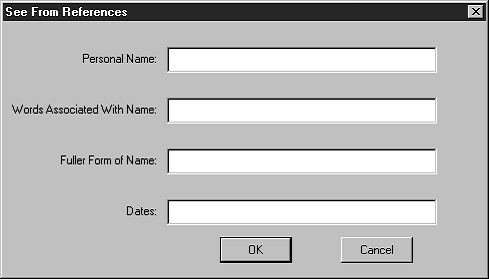
5. In the See From References group, click Add. This displays the See From Ref- erences dialog box (Figure 4.33).
FIGURE 4.33
Type entries as desired, then click OK. This places the entries in the See From References box in the Authority - Cataloging window.
6. In the See Also From References group, click Add. This displays the See Also From References dialog box, which contains the same fields as the See From References dialog box (Figure 4.33). Type entries as desired, then click OK. This places the entries in the See Also From References box in the Authority - Cataloging window.
7. When finished, click Save in the Authority - Cataloging window.
Editing an Authority Record Using the Quick Editor
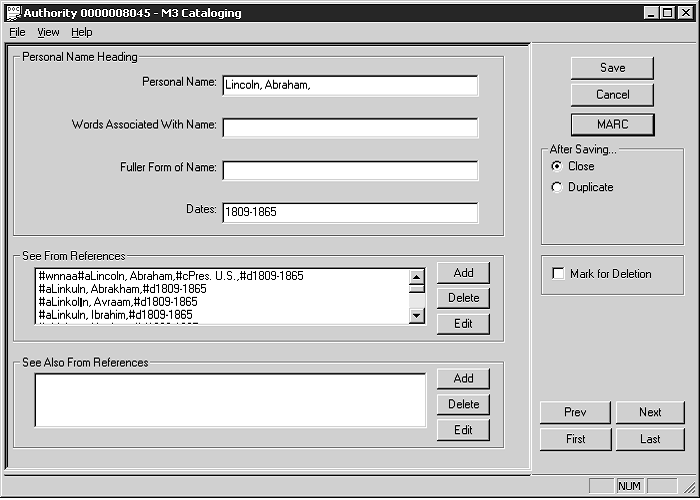
1. Display the record you want to edit in the Authority - Cataloging window (Figure 4.34). (For instructions on locating and displaying a record, follow steps 1A through 1E in “Editing an Authority Record” on
page 4-26.)
FIGURE 4.34
2. Click Quick. This displays the Authority - Cataloging Quick Editor window.
The fields available in the Heading group vary depending on the type of authority record you are editing. Shown in Figure 4.35 is the Quick Editor window for a Personal Name authority record.
FIGURE 4.35
See From references (MARC authority field 4xx) lead a searcher from an unauthorized heading to an authorized heading. See Also From references (MARC authority field 5xx) lead a searcher from an authorized heading to another related authorized heading.
NOTE: If you need access to additional fields or otherwise prefer to edit the record in MARC format, click MARC. This returns the record to MARC format (shown in Figure 4.34).
3. In the Heading group, edit entries as desired.
4. In the See From References group, select a reference, then click Delete or Edit.
• If you click Delete, the reference is deleted and removed from the See From References box.
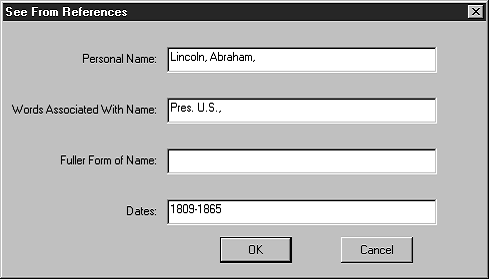
• If you click Edit, the See From References dialog box displays (Figure 4.36).
FIGURE 4.36
Edit entries as desired, then click OK. This updates the entries in the
See From References box in the Authority - Cataloging window.
5. In the See Also From References group, select a reference, then click Delete
or Edit.
• If you click Delete, the reference is deleted and removed from the See Also From References box.
• If you click Edit, the See Also From References dialog box displays, which contains the same fields as the See From References dialog box (Figure 4.36). Edit entries as desired, then click OK. This updates the entries in the See Also From References box in the Authority - Cataloging window.
6. When finished, click Save in the Authority - Cataloging window.