Installing Textbook Enabler
Textbook Enabler must be installed on your server.
1. Insert the Textbook Enabler CD into the server’s CD-ROM drive.
2. Navigate to the CD-ROM drive (D: on most computers) and double-click TextbookDB.exe.
3. In the Welcome dialog box, click Next to begin installation.
4. In the License Agreement dialog box, review the agreement and click Yes to accept and continue the installation. Or, click No to discontinue.
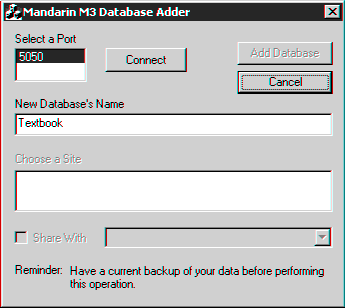
5. The module downloads, then the Database Adder dialog box displays (Figure 1).
FIGURE 1
6. In the Select a Port box, select the port that you want to have access to the textbook database, and then click Connect.
7. The entry Textbook appears in the New Database’s Name box. If you want to give your textbook database a different name, edit this entry.
8. In the Choose a Site box, select the site that you want to have access to the textbook database.
9. If you want to share the textbook database with other databases, select the Share With check box and select a database in the corresponding list.
NOTE: If you choose to share, the textbook database will have its own bibliographic and holdings tables, but will share the barcode, group, message, transaction, patron, and session tables with the database you selected.
10. When finished, click Add Database. At the confirmation prompt, click OK.
11. In the Setup Complete dialog box, click Finish.
12. If you have MARC records for your textbooks, import them into the text- book database. Otherwise, you will need to create bibliographic and holding records for your textbooks. For instructions on either procedure, refer to Chapter 4, “Using Cataloging,” in your M3 Users Guide.