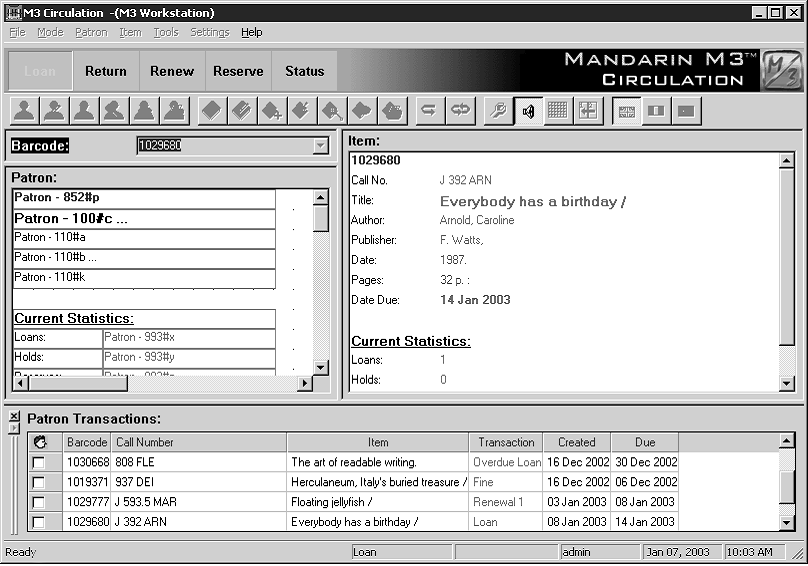
Modifying Circulation Window Displays
FIGURE 5.77
Tip: If a grid does not display in the Patron pane, right-click in the pane, then click Show Grid.
You can modify the MARC fields and font characteristics that display in the Circu- lation window. You can also configure different displays for each transaction mode (Loan, Return, Renew, Reserve, and Status) in each pane (Patron, Item, Transac- tions). M3 Circulation includes default settings for all of these situations, but you can reconfigure as appropriate for your library.
Modifying the Patron Pane Display
1. Click the toolbar button corresponding to the transaction mode to be mod- ified (Loan, Return, Renew, Reserve, or Status). Changes made to one mode will not apply to the other modes; you must modify each mode individu- ally.
2. Right-click in the Patron pane. This opens a command menu (Figure 5.9).
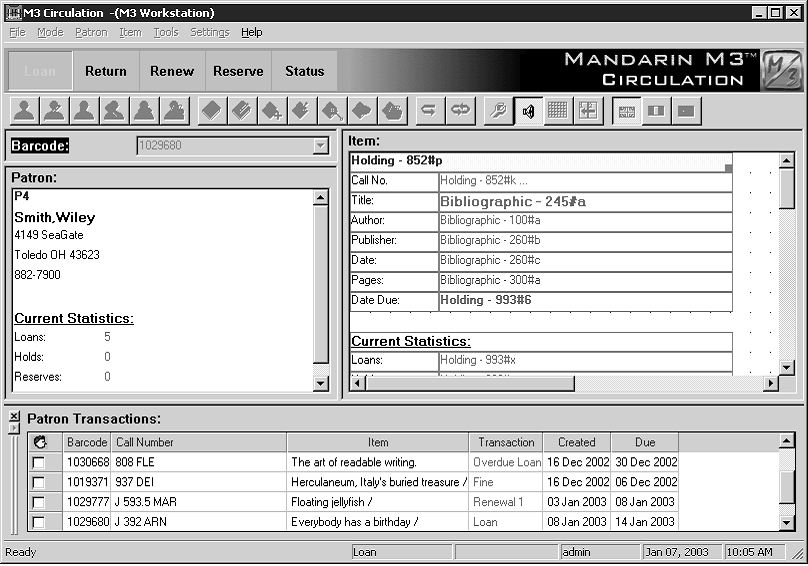
3. Click Design Mode. This changes the Patron pane to the Design mode, with information displaying in data cells (Figure 5.77).
4. To create a new cell, click where you want the cell in the Patron pane, then drag to the desired size. This displays the New Cell dialog box (Figure 5.78).
FIGURE 5.78
FIGURE 5.79
Tips:
• When selected, a cell appears with a yellow back- ground.
• To resize a cell, drag the box in the lower right corner of the cell to the desired size.
• To move a cell, drag it to the desired location. If it is part of a group of cells (displaying in blue), this moves the entire group.
Tip: You can also double-click a cell to display the Properties dialog box.
Tip: You can create a group of cells by pressing CTRL and dragging the mouse to select the desired cells. Cells in a group appear outlined in blue. Groups allow you to cut, copy, paste, delete, and align multiple cells. You can ungroup a group of cells by clicking outside of the group.
5. Click the type of cell you want to create, then click OK.
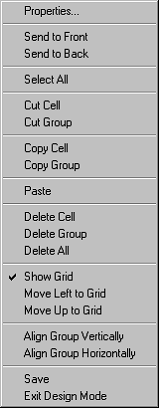
6. To modify cells, right-click a cell or group of cells. This opens a command menu (Figure 5.79).
Several of the options in this menu are explained here:
• Properties – Depending on the type of cell you select (label cell, data- base field cell, or graphic cell), a Properties dialog box appears. See the following three sections, “Modifying a Label (Text) Cell,” “Modi- fying a Database Field Cell,” and “Modifying a Graphic Cell” for instructions on modifying each cell type.
• Send To Front and Send To Back – If cells are overlapping, select a cell and click one of these options to send the cell to the front or back of the overlapping cells.
• Select All – Creates a group of all cells, including any cells that are out of view. Use the scroll bar to view all cells.
• Cut Cell and Cut Group – Deletes the cells from the display and stores it on the clipboard.
• Copy Group – If you use this option to copy a group, then click Paste, the new group is pasted on top of the original group. You can then drag the new cells to a new location.
• Paste – Pastes the last cut or copy operation. To paste multiple cells, create a group, click Copy Group, and then click Paste.
• Move Left to Grid – Aligns the selected cell with the grid line to the left of the cell.
• Move Up to Grid – Aligns the selected cell with the grid line directly above the cell.
• Align Group Vertically – Vertically aligns the group with the selected cell.
• Align Group Horizontally – Horizontally aligns the group with the selected cell.
7. When finished modifying the display, right-click in the Patron pane. In the command menu, click Save.
8. Right-click again in the Patron pane. In the command menu, click Exit Design Mode. This exits the Design mode.
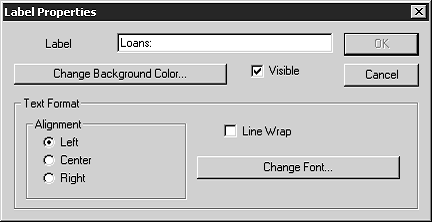
Modifying a Label (Text) Cell
To make changes in the Label Properties dialog box (Figure 5.80):
FIGURE 5.80
1. In the Label box, type any new text you want to display in the cell.
2. To change the background color of the cell, click Change Background Color. This displays the Color dialog box. Choose a color, then click OK.
3. To make the cell and its contents invisible in Display mode, clear the Visible check box.
4. In the Alignment group, select the desired text alignment.
5. If you want the text to wrap to the next line if it is too long to display in the cell, select the Line Wrap check box. NOTE: You may need to increase the height of the cell to make the wrapped text visible.
6. To change the font, click Change Font. This displays the Font dialog box. Change settings as desired, then click OK.
7. When finished, click OK.
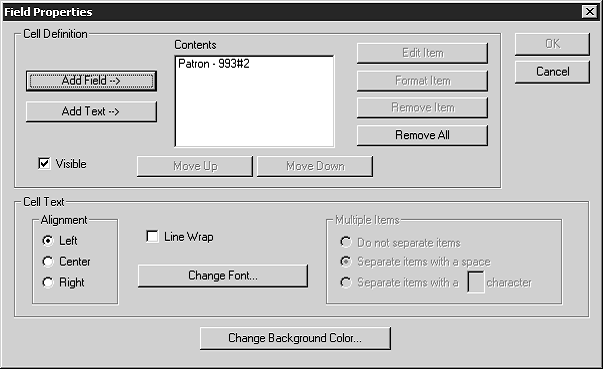
Modifying a Database Field Cell
To make changes in the Field Properties dialog box (Figure 5.81):
FIGURE 5.81
The Contents box displays items in the order they appear in the cell. To change the order, select an item and click Move Up or Move Down.
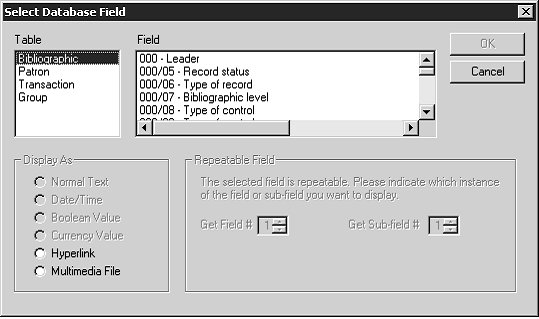
1. To add a field to a cell, click Add Field. This displays the Select Database Field dialog box (Figure 5.82).
FIGURE 5.82
2. To make changes in this dialog box:
A. In the Table list, select the table containing the data you want to display. B. In the Field list, select the record field you want to display.
C. In the Display As group, select the format in which you want the field to display.
D. If the field is repeatable, select an option in the Repeatable Field group. E. When finished, click OK. This returns you to the Field Properties dialog box (Figure 5.81).
3. To add text to the cell, click Add Text. This displays the Add Text dialog box. Type the text you want to display, then click OK.
4. To make the cell and its contents invisible in Display mode, clear the Visible check box.
Tip: You can also double-click the item to display the Select Database Field dialog box.
5. To edit an item, select the item in the Contents box, then click Edit Item. This displays the Select Database Field dialog box (Figure 5.82). To make changes, follow the procedure explained in step 2.
6. To format an item, select the item in the Contents box, then click Format Item. This displays a Format dialog box corresponding to the format you selected in step 2C. Make changes as desired, then click OK.
7. To remove an item from the cell:
• To remove one item, select the item in the Contents box, then click Remove Item. This removes the item.
• To remove all items, click Remove All. This removes all items and places an “Undefined Field” entry in the cell.
8. In the Alignment group, select the desired text alignment.
9. To make the text wrap to the next line if it is too long to display in the cell, select the Line Wrap check box.
10. To change the font, click Change Font. This displays the Font dialog box. Change settings as desired, then click OK.
11. In the Multiple Items group, indicate how you want to separate multiple items in this cell.
12. To change the background color of the cell, click Change Background Color. This displays the Color dialog box. Select a color, then click OK.
13. When finished, click OK.
Modifying a Graphic Cell
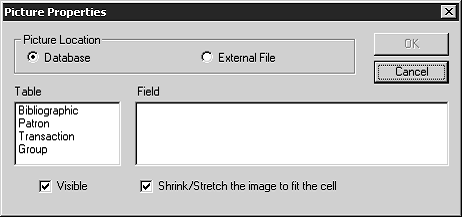
To make changes in the Picture Properties dialog box (Figure 5.83):
FIGURE 5.83
1. In the Picture Location group, click Database or External File.
• If you choose Database, select the table containing the data you want to display in the Table list, then select the field you want to display in the Field list.
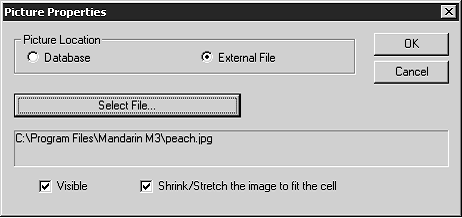
• If you choose External File, click Select File. This displays the Open dialog box. Navigate to the location of the file you want to open, then click Open. This displays the path and file name in the Picture Proper- ties dialog box, as shown in Figure 5.84.
FIGURE 5.84
FIGURE 5.85
Tip: If a grid does not display in the Item pane, right-click in the pane, then click Show Grid.
2. To make the image invisible in Display mode, clear the Visible check box.
3. If you want the image to fit the dimensions of the cell, select the Shrink/ Stretch the image to fit the cell check box. NOTE: If the image is larger than the cell and you do not select this check box, only a portion of the image will appear in the cell.
4. When finished, click OK.
Modifying the Item Pane Display
1. Click the toolbar button corresponding to the transaction mode to be mod- ified (Loan, Return, Renew, Reserve, or Status). Changes made to one mode will not apply to the other modes; you must modify each mode individually.
2. Right-click in the Item pane. This opens a command menu (Figure 5.9).
3. Click Design Mode. This changes the Item pane to the Design mode, with data displaying in cells (Figure 5.85).
4. Follow steps 4 through 8 beginning on page 5-60 to modify the data dis- played in the Item pane, substituting the word “item” for “patron” in the procedure.
Modifying the Transactions Pane Display
There are three Transactions pane displays: Patron, Item, and Library Transac- tions. Each has a different display configuration. This section explains how to modify the Patron and Item displays for the Transactions pane. To modify the Library Transactions display, see “Modifying the Transactions Pane for Library Transactions” on page 5-67.
To modify the Patron or Item displays for the Transactions pane:
1. Click the toolbar button corresponding to the transaction mode to be mod- ified (Loan, Return, Renew, Reserve, or Status).
2. In the Barcode box, type the patron (or item) barcode, and then press ENTER (or scan the code).
3. Right-click in the Transactions pane. This opens a command menu (Figure 5.10).
4. Click Design Mode. This changes the Transactions pane to the Design mode and clears the pane.
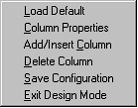
5. In the Transactions pane, right-click the column heading of the column you want to edit. This opens a command menu (Figure 5.86).
FIGURE 5.86
Tip: You can also double-click the column heading to open the Column Properties dialog box.
FIGURE 5.87
6. If you want to delete the column or insert a new column, click the appropriate command.
OR
If you want to revert to the default settings for the Transactions pane, click Load Default.
OR
If you want to edit the properties of the selected column, click Column Prop- erties. This displays the Column Properties dialog box (Figure 5.87).
Edit the column properties as desired:
• Display options – Each column has different display properties for bib- liographic items and equipment items. Bibliographic display settings apply when the transaction involves a bibliographic item, and equip- ment display settings apply when the transaction involves an equip- ment item. Therefore, you may want to click Bibliographic Display and select the settings used for bibliographic items, then click Equipment Display and select the settings used for equipment items.
• Header group – To establish display properties for the column header:
A. In the Column Header box, type the column heading text.
B. To change the font properties for the column data, click Font. This displays the Font dialog box. Modify the font properties as desired, then click OK.
C. Click a Text Alignment option to establish the text justification for the column header.
• Join group – If the information in this cell should be joined with the information displayed in the cell to the right (the information is com- bined and displays in the left cell):
A. Select the Join Cells check box.
B. In the Separator box, type a space, comma, or any other text to separate the content of the two cells.
• Data group – To set up the data that displays in this column:
A. In the Table list, select the table containing the data you want to display.
B. In the Field list, select the record field you want to display.
C. To change the font properties for the column data (as shown in the sample text in the Preview box), click Font. This displays the Font dialog box. Modify the font properties as desired, then click OK.
D. Click a Text Alignment option to establish the text justification for data in the column.
• Format group – If the column data requires a consistent format, click an option (Date, Numeric, Boolean), and then click the desired format in the corresponding list.
7. When finished editing entries for this column, click OK.
8. Repeat steps 5 through 7 for each column you want to modify in the Trans- actions pane.
9. When finished, right-click in the Transactions pane. In the command menu (Figure 5.86), click Save Configuration. (Or, to revert to the default settings for the Transactions pane, click Load Default.)
10. Repeat steps 1 through 9 for each transaction mode you want to modify in the Transactions pane.
11. When finished, right-click in the Transactions pane. In the command menu (Figure 5.86), click Exit Design Mode. This exits the Design mode.
Modifying the Transactions Pane for Library Transactions
To modify the Library Transactions display for the Transactions pane:
1. On the Mode menu, click Library Transactions.
2. Right-click in the Transactions pane. This opens a command menu (Figure 5.73).
3. Click Design Mode. This changes the Transactions pane to the Design mode and clears the pane.
4. Follow the procedure in steps 5 through 11 beginning on page 5-65.