Using the Message Utility
About Messages and Block Types
You can attach one or more messages to a patron record so the messages appear whenever the patron barcode is entered. Similarly, you can attach messages to an item record that appear each time the item’s barcode is entered.
When attaching a message to a record, the attacher must also assign a block type to the attachment. The four block types are:
• Information Blocks – When an information block message appears, the user can bypass the message by clicking anywhere on the Circulation window. This is the least intrusive block type.
• Blocking Blocks – When a blocking block message appears, the user must select an option in the message dialog box in order to proceed.
• Nudge Blocks – When a nudge block message appears for the first time, the user must select an option in the dialog box in order to proceed, as with a blocking block message. Any time this message appears again with this record, it acts as an information block (no decision required to bypass).
• Privilege Blocks – When a privilege block message appears, a password is required to bypass the message dialog box. This is the most intrusive block type.
Adding Messages to the Circulation System
As part of the initial circulation setup, a bank of patron and item messages appro- priate for your library should have been defined. You can add, edit, and delete mes- sages within the bank at any time.
Generally, when you want to modify your message bank, you use the Messages utility on the Tools menu. However, if you need to create or edit a message while conducting a circulation transaction, you can also access and modify the message bank “on the fly.”
Both options are described in the following sections.
Creating a Bank of Patron and Item Messages
To add messages to the bank when not conducting a transaction:
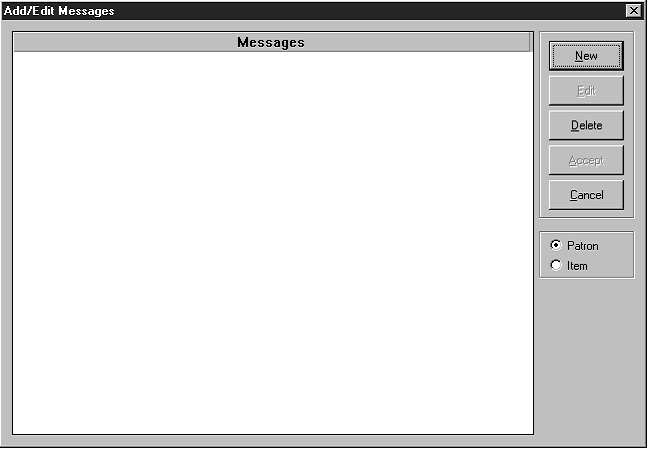
1. On the Tools menu, click Messages. This displays the Add/Edit Messages window (Figure 5.53). If no messages have been added at your library, this window is empty.
FIGURE 5.53
2. Click Patron or Item, depending on the type of messages you want to add.
3. Click New. This displays the Add New Message dialog box (Figure 5.54).
FIGURE 5.54
Tip: General messages provide greater flexibility.
4. Type the message, then click OK. Your new message appears in the Add/ Edit Messages window.
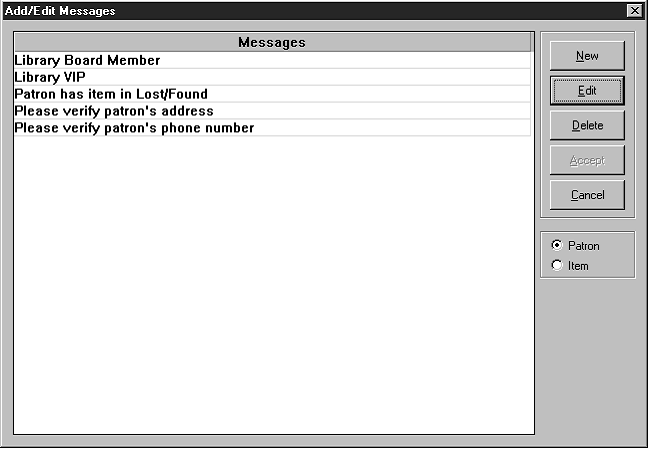
5. Repeat steps 3 and 4 for each message you want to include. After adding several messages, the Add/Edit Messages window looks similar to the example in Figure 5.55.
FIGURE 5.55
Note: Only messages not in use can be deleted.
6. When finished, click Cancel.
Deleting a Message from the System
To delete a message from the circulation message bank:
1. On the Tools menu, click Messages. This displays the Add/Edit Messages window (Figure 5.55).
2. Click the message type you want to delete, Patron or Item.
3. Select the message you want to delete, then click Delete. Repeat this step for each message you want to delete.
NOTE: If Delete is not active, the selected message is attached to a record and cannot be deleted.
4. When finished, click Cancel.
Attaching a Message to a Patron Record
While conducting a circulation transaction, you can attach, create, and edit a patron message.
Attaching an Existing Message to a Record
1. In the Barcode box, type the patron barcode, and then press ENTER (or scan the code).
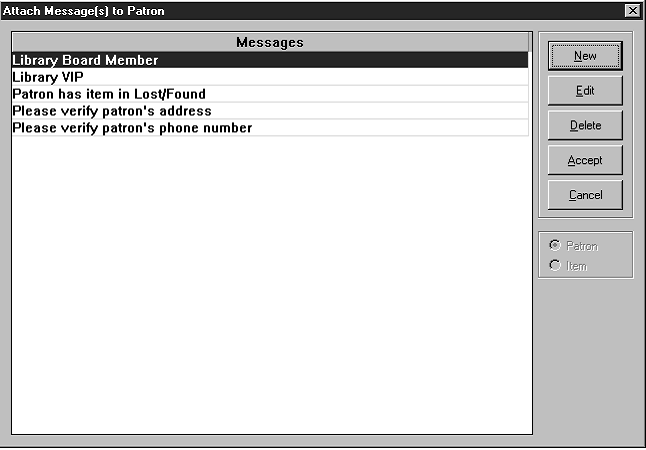
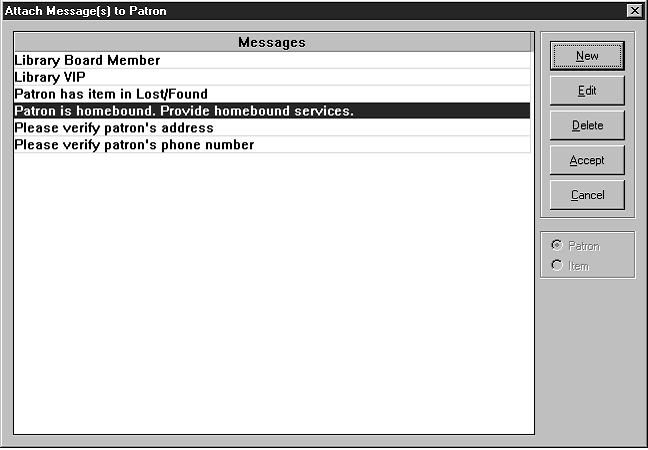
2. On the Patron menu, click Messages. This displays the Attach Message(s) to Patron window (Figure 5.56), listing all available patron messages.
FIGURE 5.56
3. From here, do one of the following:
• If the list includes any appropriate messages:
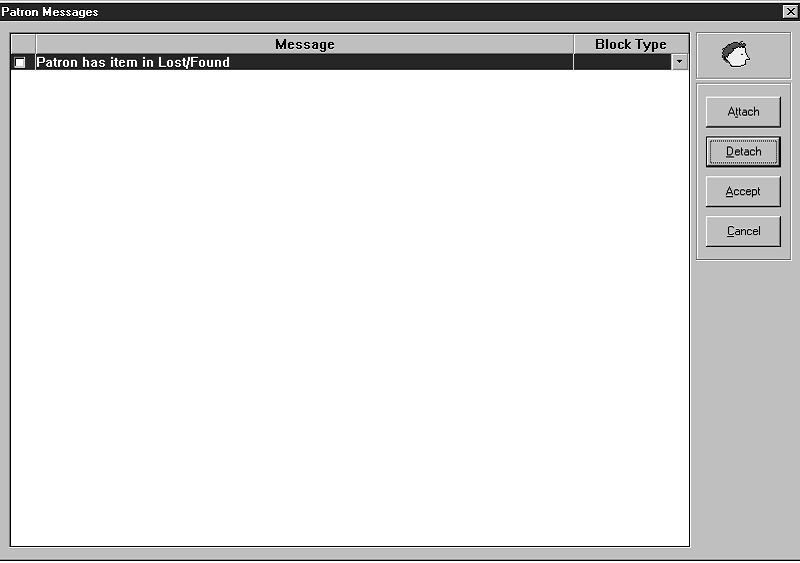
A. Select all desired messages, then click Accept. This displays the Patron Messages window (Figure 5.57).
FIGURE 5.57
If this patron already has messages attached, the Patron Messages window (Figure 5.57) lists all attached messages. Click Attach to attach a different message, or Detach to detach this message.
B. Select a block type in the Block Type list. Do this for each selected message. (Block types are defined on page 5-41.)
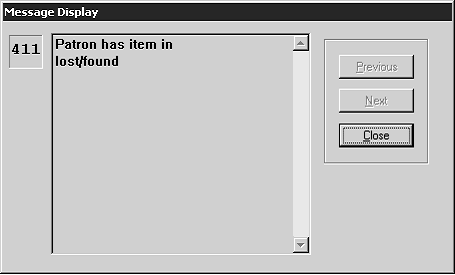
C. When finished, click Accept. The attached messages (as shown in Figure 5.58) appear whenever this patron record is accessed from M3 Circulation.
FIGURE 5.58
This procedure assumes you are working with a patron message; however, the procedure also works for item messages.
• If the message you need does not appear in the list, follow the proce- dure in the next section, “Creating a Message “On the Fly”.”
• If a similar message exists that you want to edit before attaching, follow the procedure in “Editing a Message “On the Fly”” on
page 5-46.
NOTE: If you edit a message that is attached to other records, the edited version displays for all records.
Creating a Message “On the Fly”
If you are conducting a circulation transaction and the message you want to attach does not exist in the message bank, you can create the new message during the transaction, or “on the fly.” To do so:
1. In the Barcode box, type the patron barcode, and then press ENTER (or scan the code).
2. On the Patron menu, click Messages. This displays the Attach Message(s) to Patron window (Figure 5.56).
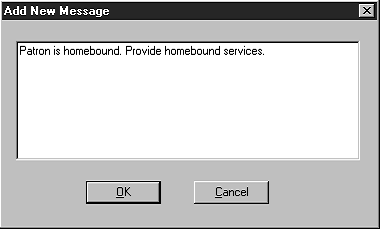
3. Click New. This displays the Add New Message dialog box (Figure 5.59).
FIGURE 5.59
4. Type the message, then click OK. The new message appears in the Attach Message(s) to Patron window (Figure 5.60).
FIGURE 5.60
5. If you are satisfied with the message, click Accept. This displays the Patron Messages window (Figure 5.57).
6. Select the new message, then click a block type in the Block Type list.
7. When finished, click Accept. The attached message (as shown in Figure 5.58) appears whenever this patron record is accessed from M3 Circulation.
Editing a Message “On the Fly”
If you are conducting a library transaction and the message you want to attach requires editing, you can do so during the transaction, or “on the fly.” To do so:
1. In the Barcode box, type the patron barcode, and then press ENTER (or scan the code).
2. On the Patron menu, click Messages. This displays the Attach Message(s) to Patron window (Figure 5.60).
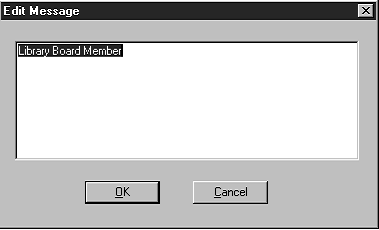
3. Select the message you want to edit, then click Edit. This displays the Edit Message dialog box (Figure 5.61) with the selected message displayed.
FIGURE 5.61
4. Edit the message as desired, then click OK.
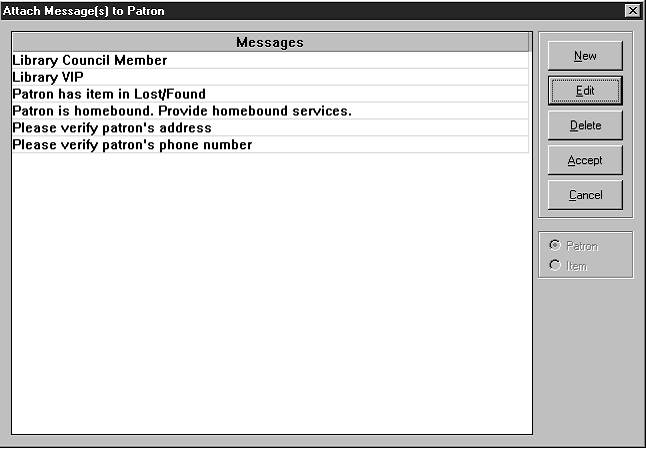
5. Your edited message appears in the Attach Message(s) to Patron window (Figure 5.62).
FIGURE 5.62
6. If satisfied with the message, click Accept. This displays the Patron Mes- sages window (Figure 5.57).
7. Select the new message, then click a block type in the Block Type list.
8. When finished, click Accept. The attached message (as shown in Figure 5.58) appears whenever this patron record is accessed from M3 Circulation.
Attaching a Message to an Item Record
While conducting a circulation transaction, you can attach, create, and edit an item message. The procedure to attach a message to an item record is similar to the procedure for patron records; only the access path and window names are dif- ferent.
To attach a message to an item record:
1. In the Barcode box, type the item barcode, and then press ENTER (or scan the item’s barcode).
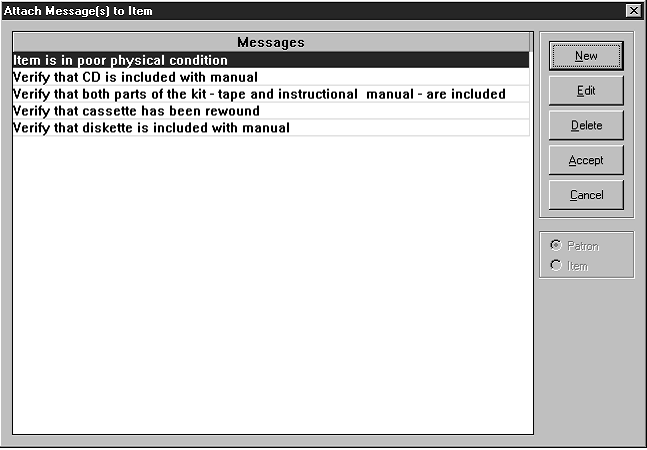
2. On the Item menu, click Messages. This displays the Attach Message(s) to Item window (Figure 5.63), listing all available item messages.
FIGURE 5.63
3. From here, do one of the following:
• If the list includes any appropriate messages:
A. Select the desired messages, then click Accept. This displays the Item Messages window (Figure 5.64).
FIGURE 5.64
If this item already has messages attached, the Item Messages window (Figure 5.64) lists all attached messages. Click Attach to attach a different message, or Detach to detach this message.
B. Select a block type in the Block Type list. Do this for each selected message. (Block types are defined on page 5-41.)
C. When finished, click Accept. The attached messages (as shown in Figure 5.58) appear whenever this item record is accessed from M3 Circulation.
• If the message you need does not appear in the list, follow the proce- dure in “Creating a Message “On the Fly”” on page 5-45.
• If a similar message exists that you want to edit before attaching, follow the procedure in “Editing a Message “On the Fly”.
NOTE: If you edit a message that is attached to other records, the edited version displays for all records.
Detaching a Message
If a message displays after you enter a patron or item barcode, you can detach the message during the transaction. To do so:
1. Close the message. On the Patron or Item menu (depending on which type of record the message is attached to), click Messages. This displays the Item Messages or Patron Messages window (Figure 5.65),
FIGURE 5.65
2. Select the message you want to detach, and then click Detach.
3. Click Accept. This detaches the message.