Working with Patron Records
You can search for, edit, and create patron records from both the M3 Circulation module and the M3 Cataloging module. When adding several records, M3 Cata- loging is the best module to use. To delete records, you must use the M3 Cataloging module.
Patron records are treated as a separate MARC database within M3 Circulation.
Searching for a Patron Record
You may want to search for a patron record if you do not know the patron’s bar- code. There are two methods of searching in Circulation—from the main window and with the Search dialog box.
Searching from the Main Window
This procedure is a quick and simple method of searching for a patron by name.
NOTE: If you are in Loan, Reserve, or Booking mode and another patron already appears in the Patron pane, press ESC to clear the pane before searching by this method.
1. Type the patron’s last name in the Barcode box.
2. If a match is found, the record displays in the Patron pane of the Circula- tion window, ready for a transaction. NOTE: If no match is found for a patron but a match is found for an item, the item results display.
OR
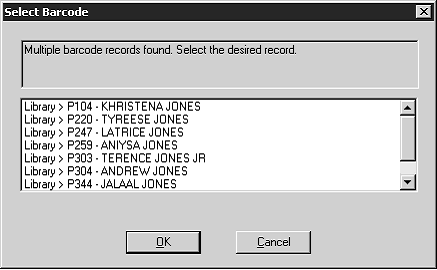
If more than one match is found, the Select Barcode dialog box displays (Figure 5.30). Click the desired record, then click OK. The record displays in the Patron pane of the Circulation window, ready for a transaction.
FIGURE 5.43
Searching with the Search Dialog Box
This procedure offers more search options.
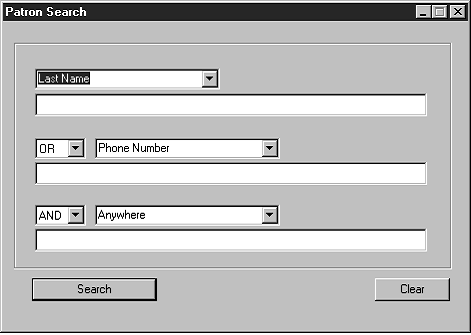
1. On the Patron menu, click Search. This displays the Patron Search dialog box (Figure 5.44).
FIGURE 5.44
Note: Your system can be configured to display different patron record fields and Boolean operators, as well as different options within the record field lists.
2. Type your search query into the appropriate boxes. To select a different MARC field or Boolean operator, click the arrow next to the appropriate list, and then select the preferred field or operator.
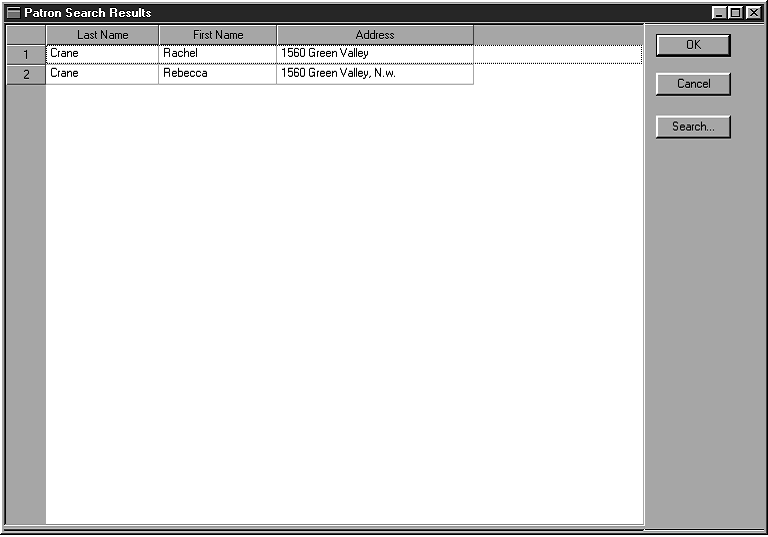
3. Click Search. This displays the Patron Search Results window (Figure 5.45) with your search results listed.
FIGURE 5.45
Tip: You can also double-click a patron record to transfer the information to the Circulation window.
Tip: If you think the name may be misspelled in the system, use truncation to broaden your keyword search. For example, type whitn* to locate whitney, whitnee, whitnie, and so on.
4. From here, you can:
• Select a patron, then click OK. This transfers the patron information into the Patron pane in the Circulation window.
OR
• Click Search to display the Patron Search dialog box (Figure 5.44) and begin a new search.
OR
• Click Cancel to return to the Circulation window.
Creating a Patron Record
At times, it may be convenient to create a patron record while using the M3 Cir- culation module. You can also create records from the M3 Cataloging module. If you have several records to add, you may find it more efficient to import them using the M3 Cataloging module. To do so, see “Importing Bibliographic, Patron, and Authority Records” on page 4-55.
When adding a patron record, you must first conduct a search to confirm that the patron is not already entered in the system.
To create a patron record:
1. On the Patron menu, click Add Patron.
• If more than one patron template exists, the Templates dialog box dis- plays. Select the template you want to use, then click OK. This displays the Patron Search dialog box (Figure 5.44).
OR
• If only one patron template exists, the Patron Search dialog box (Figure 5.44) displays.
2. To make sure the patron is not already in the system, type the patron’s information in the appropriate keyword boxes, then click Search.
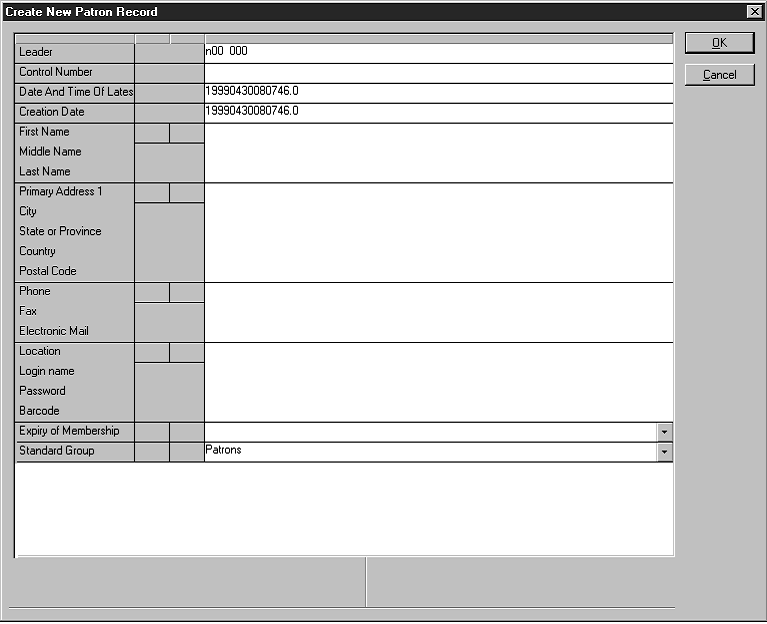
• If there is no patron in the system with this information, the Create
New Patron Record window displays (Figure 5.46).
OR
• If there is a patron in the system with this information, the Patron Search Results window displays the search results (Figure 5.45). Review the list to confirm that the patron you are entering is not included, then click Cancel. This displays the Create New Patron Record window (Figure 5.46).
FIGURE 5.46
Tip: To insert a picture field in this record so a picture displays in the Patron pane when the patron is selected, see “Adding a Picture Field to a Bibliographic or Patron Record” on page 5-38.
3. Edit this record as needed. For instructions, see step 3 beginning on page 5-27. NOTE: Since Authority Control fields are not available for patron records, skip the Authority Control option explained on page 5-28.
4. When finished, click OK to save your changes.
Editing a Patron Record
To edit a patron record:
1. In the Barcode box, type the patron barcode, and then press ENTER (or scan the code). This displays patron information in the Patron pane of the Circulation window.
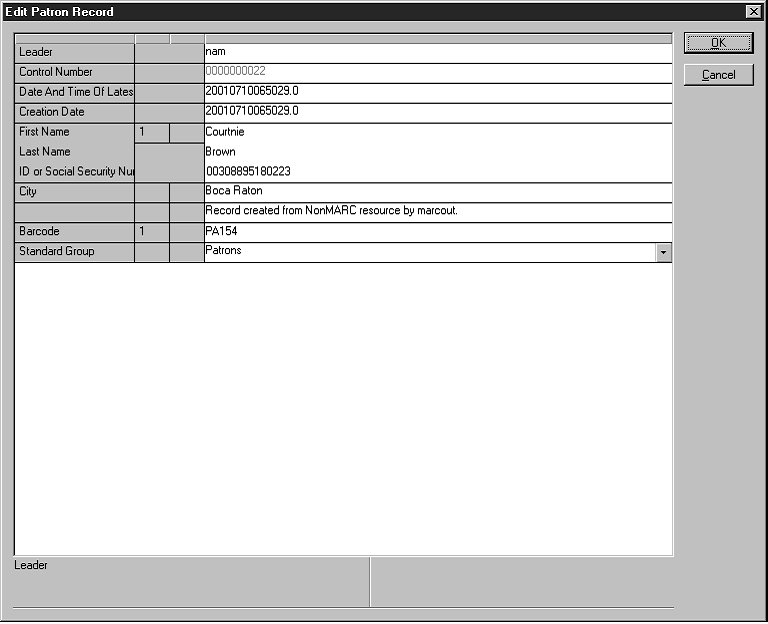
2. On the Patron menu, click Edit Patron. This displays the Edit Patron Record window (Figure 5.47).
FIGURE 5.47
3. Edit this record as needed.
NOTE: Since Authority Control fields are not available for patron records, skip the Authority Control option.
4. When finished, click OK to save your changes.
Deleting a Patron Record
You cannot delete a patron record from the M3 Circulation module. For security reasons, you must delete patron records from the M3 Cataloging module. For instructions, see “Deleting and Undeleting Records”